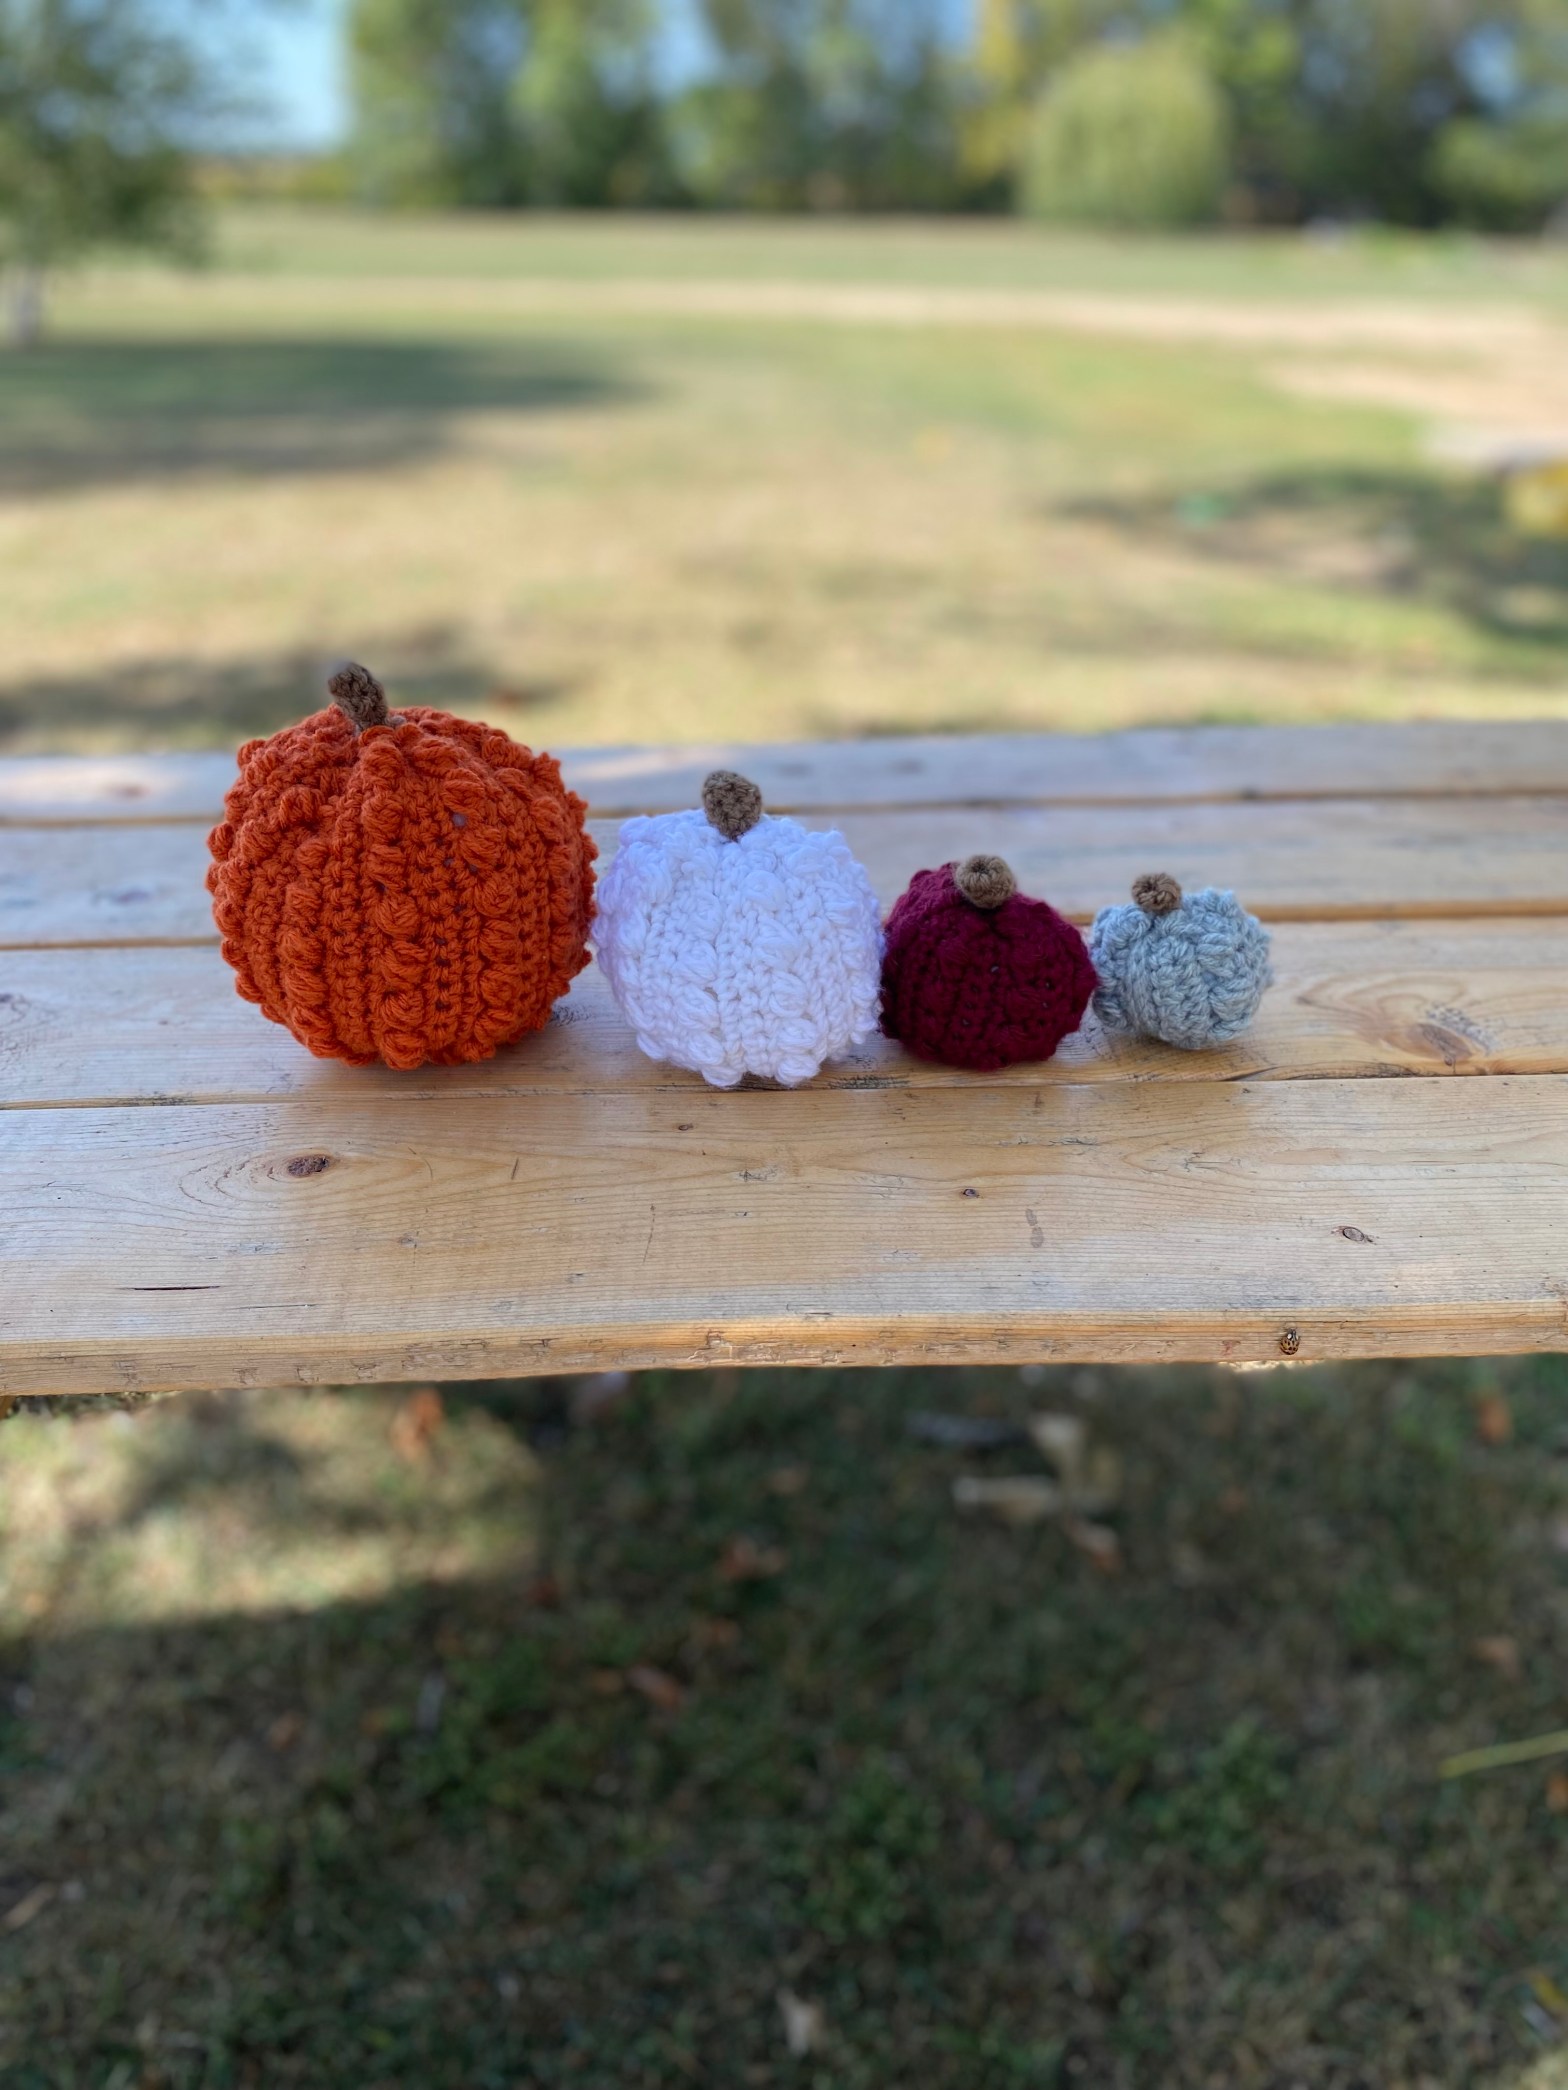
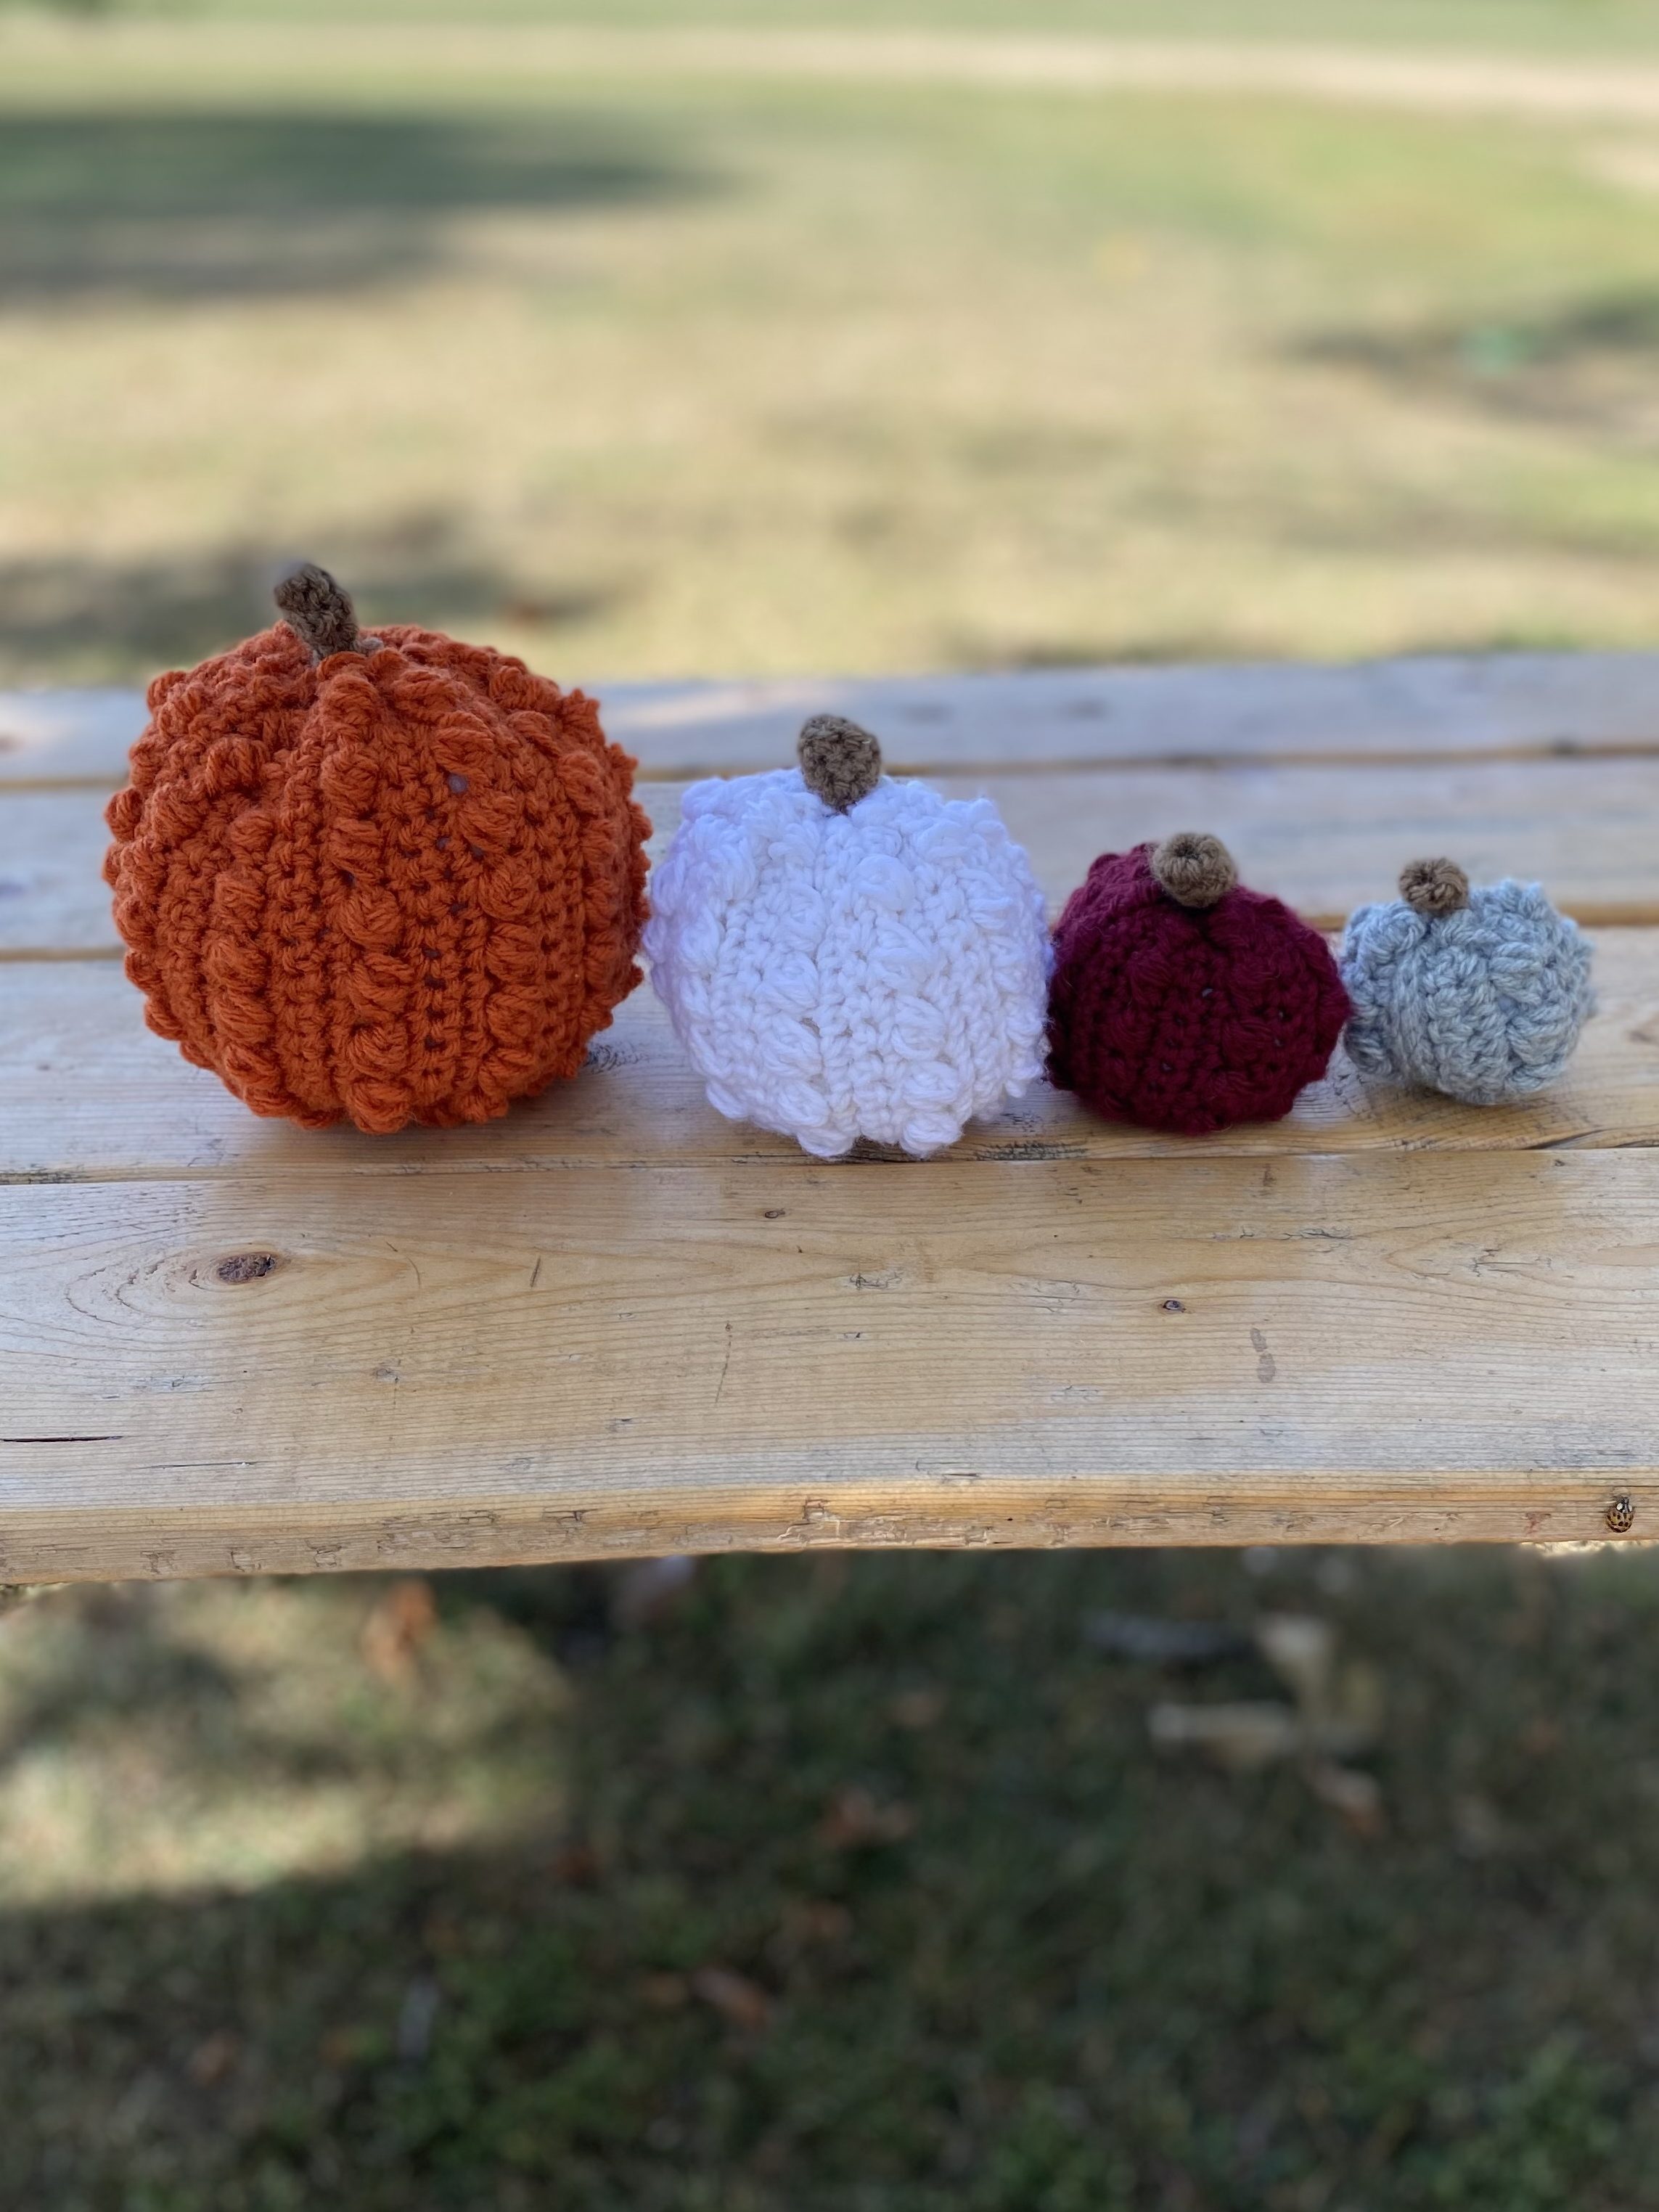
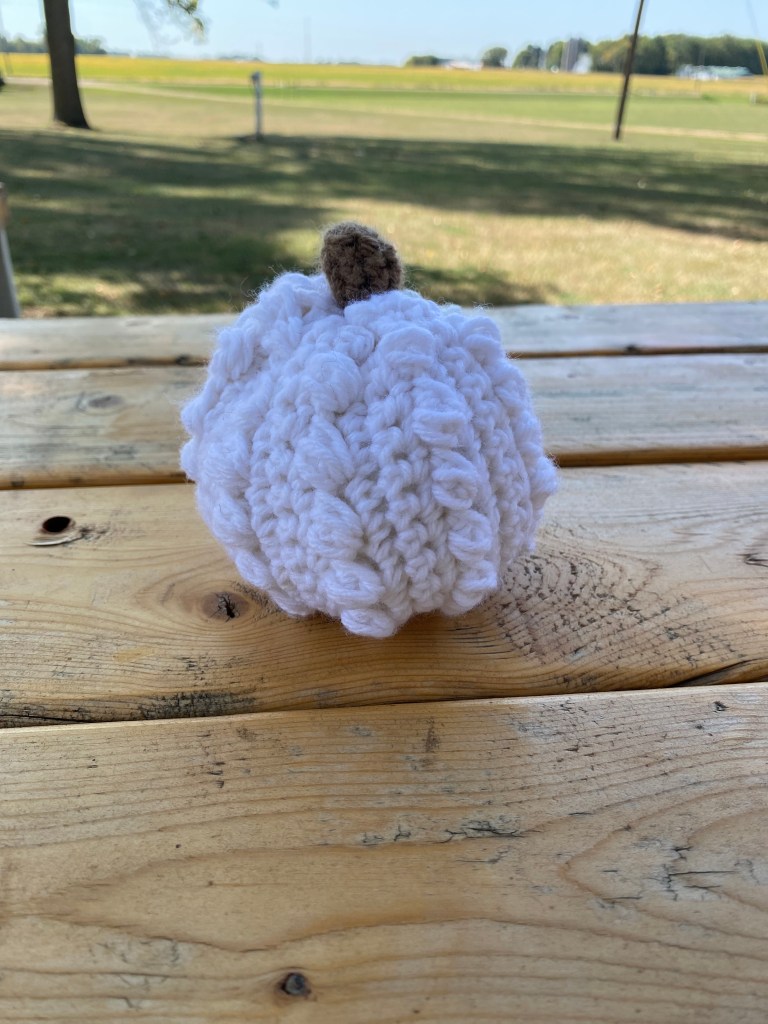
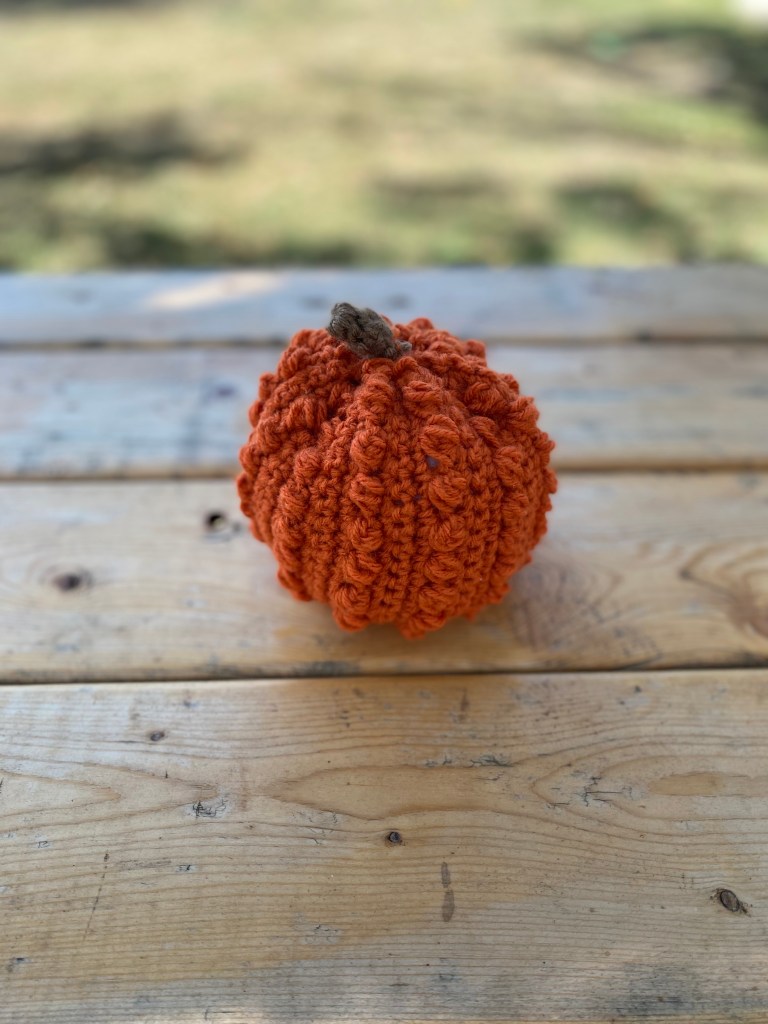
It’s officially Fall so that means you all need another pumpkin pattern! So here is my easy beginner pumpkin pattern. I wanted something that was free and easy to follow so I hope you all agree!
Materials:
*G(4.25mm) hook
*Worsted yarn (I really like Caron Simply Soft yarn for this pattern) ( 2 colors, one for pumpkin and one for stem)
*Fiber filling/stuffing material
*Scissors and needle
Notes:
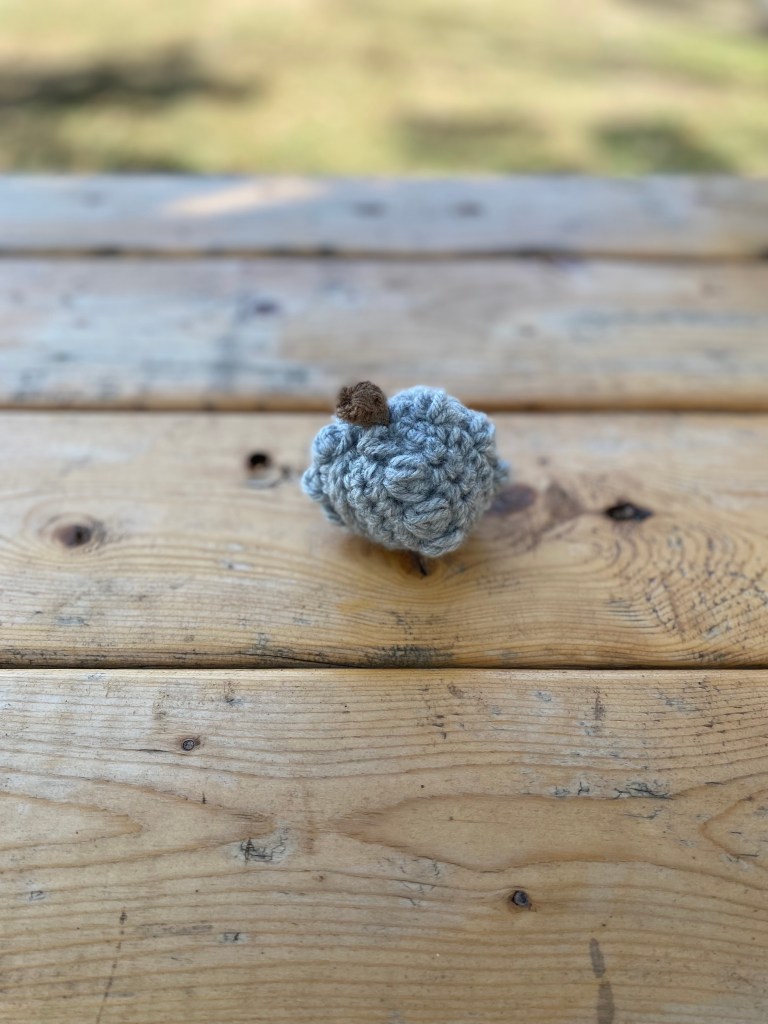
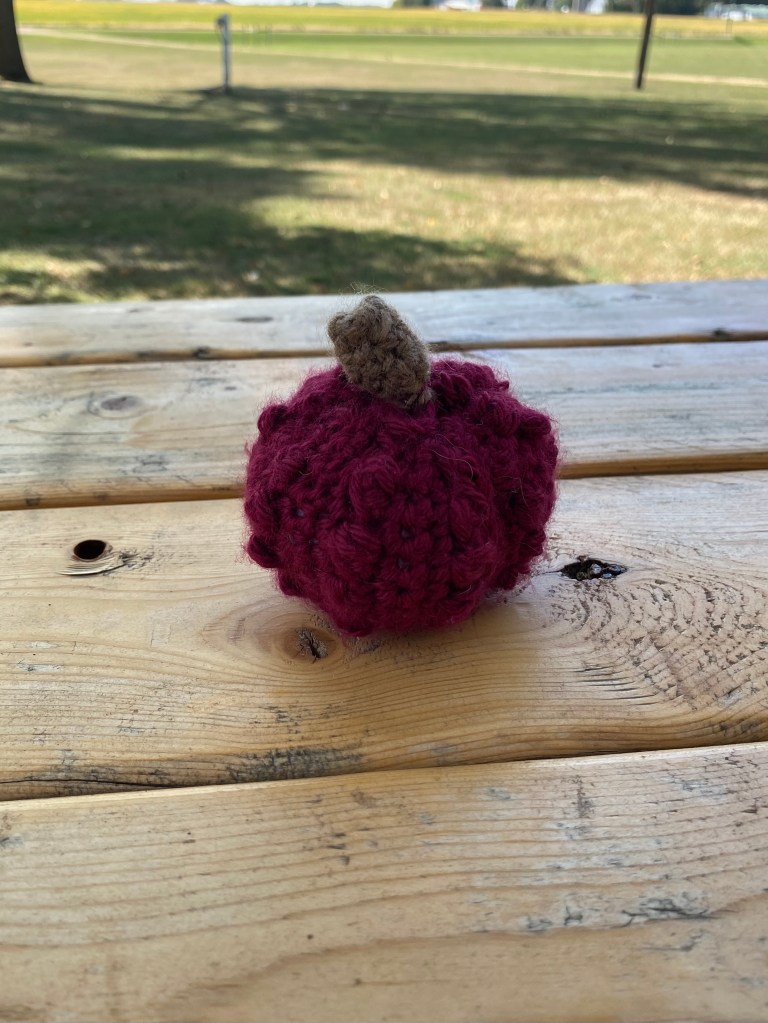
*4 sizes of pumpkins (XS, S, M, L)
*Pattern is in US terms
*Level: beginner
*puff stitch: YO, insert hook in designated st, **yo and pull up a loop, yo. Insert hook into same st) repeat ** 3 times. 7 loops on the hook and yo and pull through all loops on hook
*YO = yarn over
*Sl st = slip stich
*Ch = chain
*DC = double crochet
*SC = single crochet
XSSmallMediumLarge
Pattern:
Chain 10 for X-small (15 for Small) (20 for Medium) (25 for Large)
Single crochet across
Turn, Ch 1 *puff into first st, sl st into next st*, repeat ** across
Turn, Ch 1, Sc across
Repeat row 4
Repeat row 4
Repeat row 3
Continue repeat row 4 three times and then row 3 one time til desire length
20 rows for XS (38 for S) (40 for M) (48 for L)
For stem:
G/4mm hook
Ch 4. Sl st into first chain (make a magic circle). Ch 1. 5 dc into center. Sc around until desired height (I usually make it bigger for the bigger pumpkins and smaller for the XS pumpkins). Fasten off, leave a long tail to attach it to the pumpkin.
Assembly:
Using a needles and a long tail, match up short ends together (inside out) and sl st together. Weave in and out of the top edging of your work. Pull tight and secure to close. Turn right side. Fill with desired amount of stuffing. Weave yarn along top in and out and pull tight and secure close, leave a tail to help attach the stem. Tie completed stem tail to tail from pumpkin, stitch around stem to attach securely to pumpkin. Tie 3 times and cut off extra.
Sample size is for women, but can easily be adjusted for any size head. Just measure head circumference and adjust the chain length accordingly
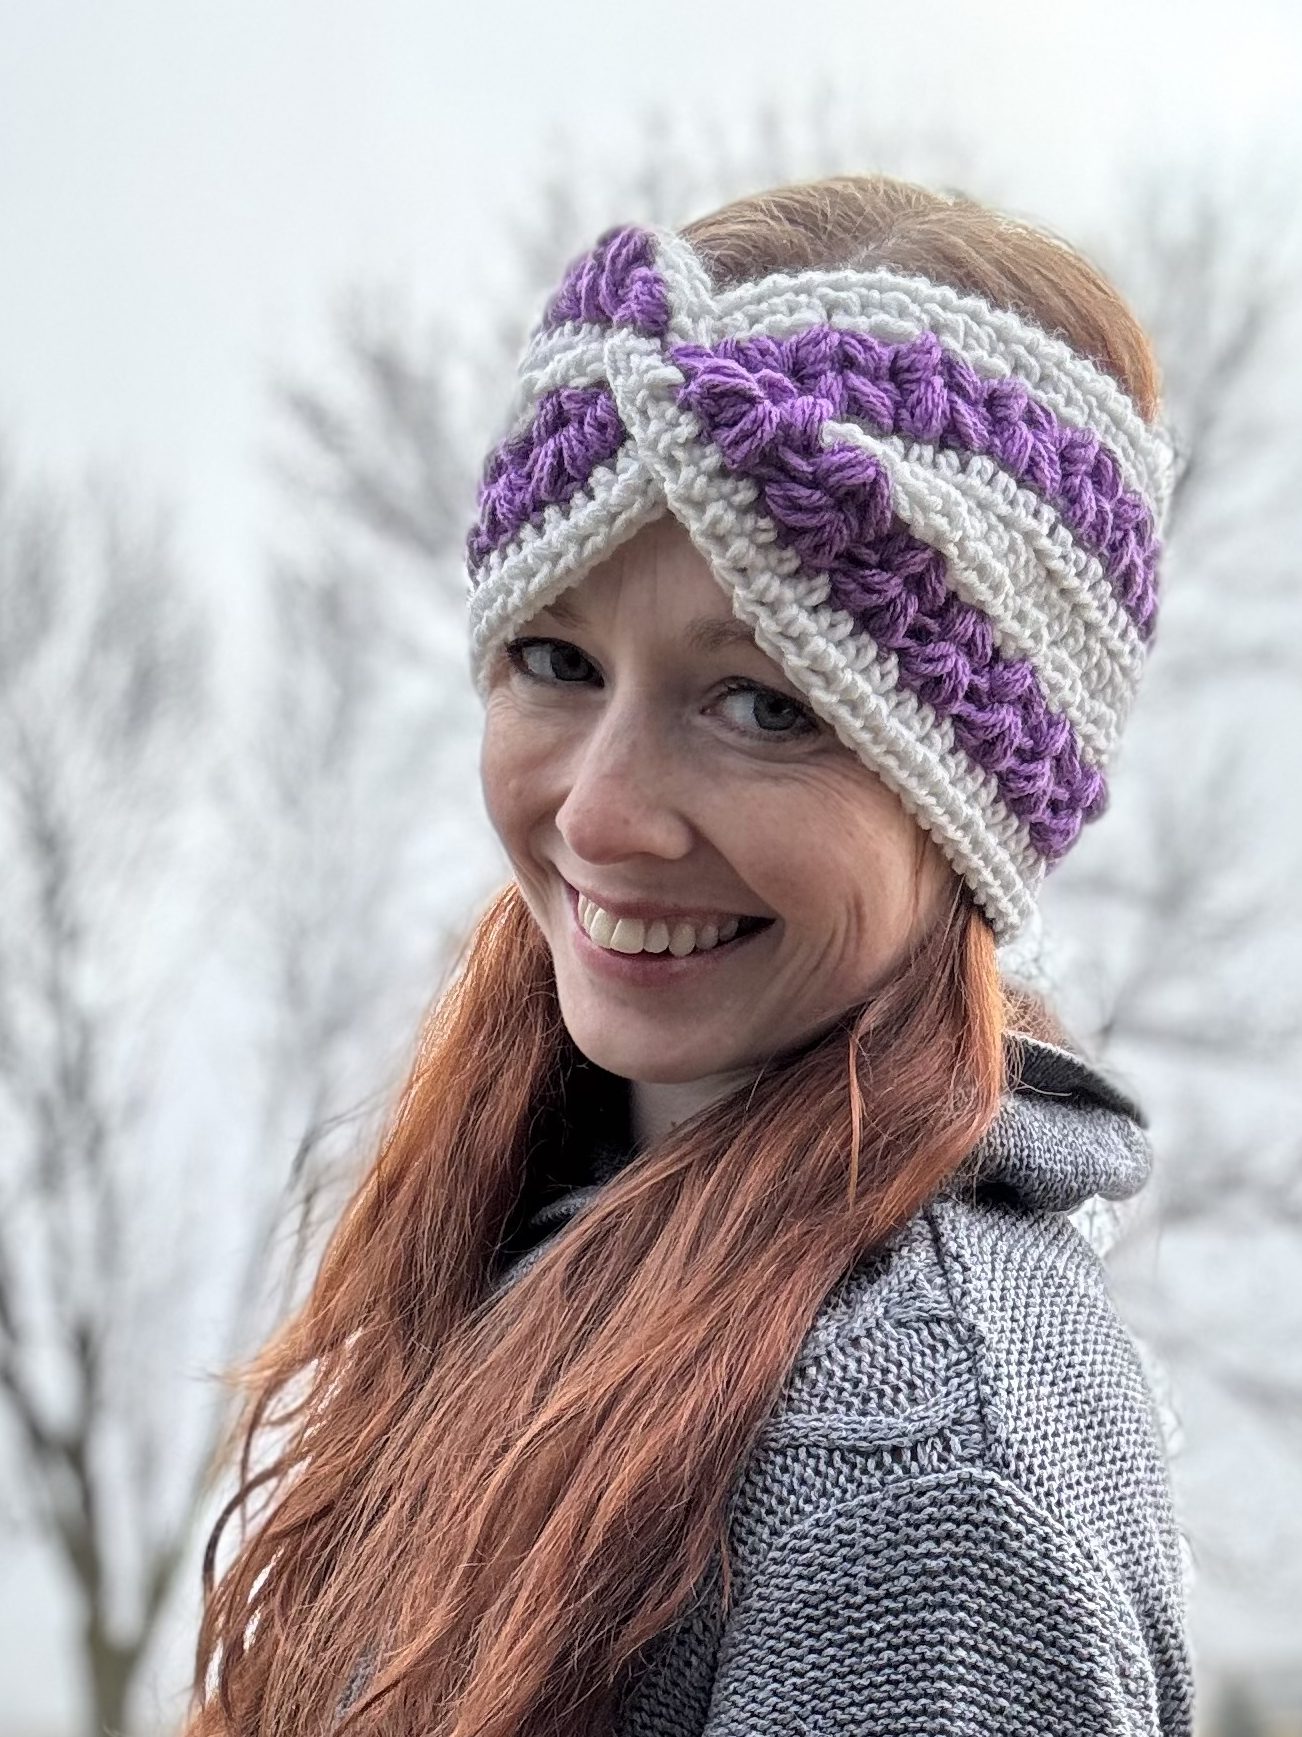
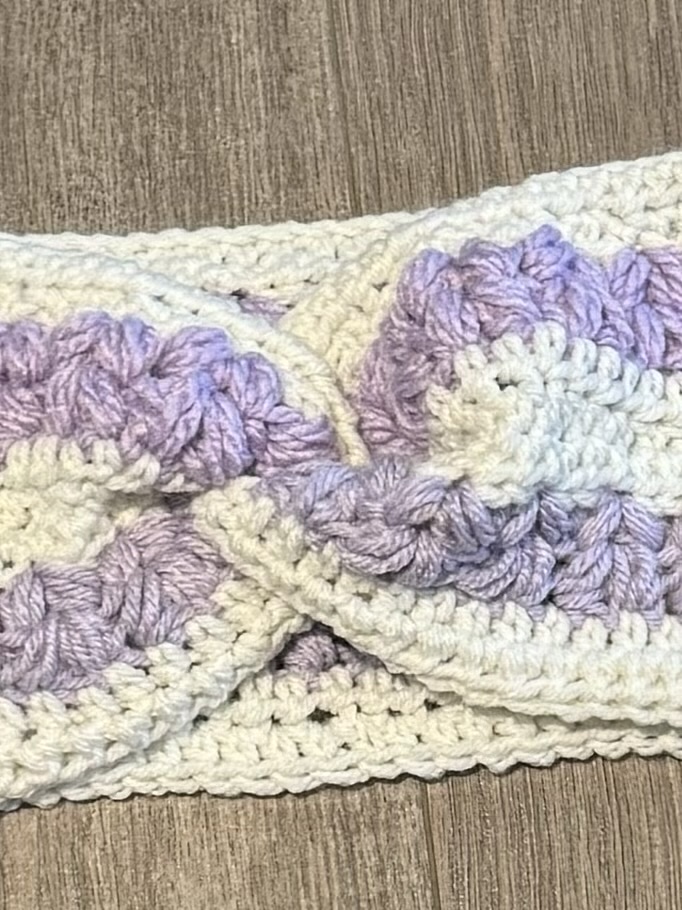
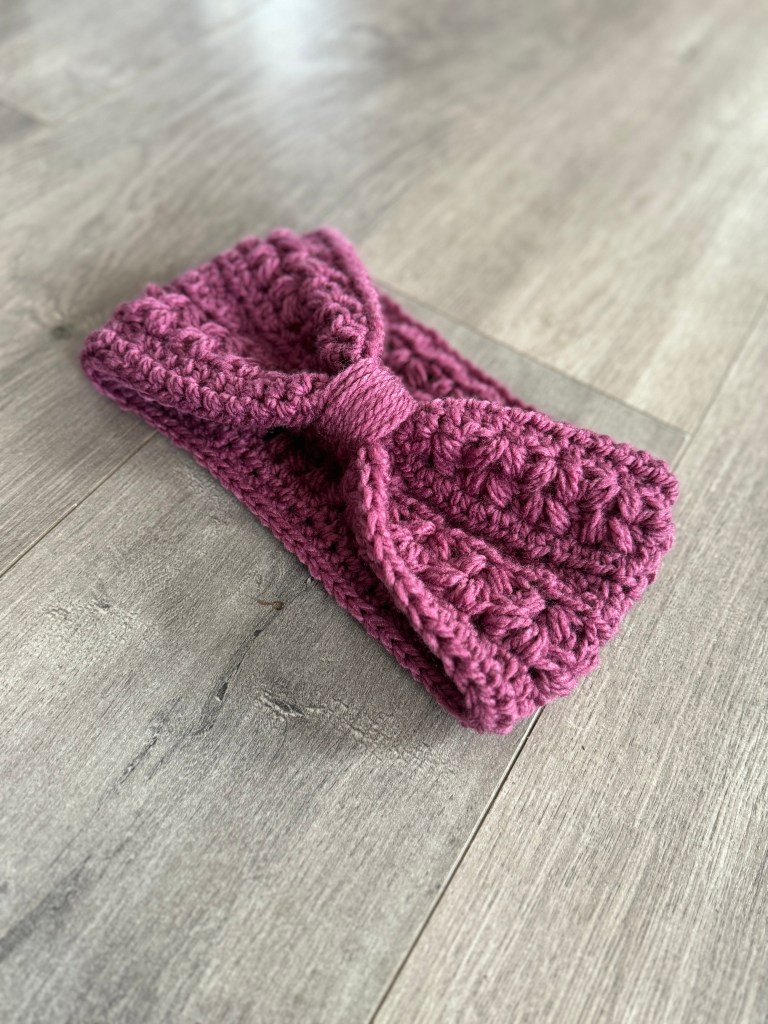
Two colors used, referred to as color A and color B throughout pattern
Stitches Used:
Ch – Chain
HDC – Half double crochet
Puff stitch/pf – YO, insert hook in designated st, **yo and pull up a loop, yo. Insert hook into same st) repeat ** 3 times. 7 loops on the hook and yo and pull through all loops on hook
Pattern:
With color (A), Chain 75 or whatever size wraps around your head
Row 1: (color A), HDC across, turn
Row2: (color A) Ch 1, HDC across, turn
Row 3: (Switch to color B) ch 1, puff stitch in first st, in next st *puff st, ch 1, puff st in same st, sk next 2 st*, repeat ** across til last st, single puff in last st
Row 4: (color B) ch 1, puff st in the ch 1 space, ch 1, puff in same ch 1 space, repeat in the ch 1 spaces across
Row 5: (Switch to color A) Ch 1, HDC across
Row 6: (color A) Ch 1, HDC across
Row 7: (color A) Ch 1, HDC across
Row 8: (Switch to color B) ch 1, puff stitch in first st, in next st *puff st, ch 1, puff st in same st, sk next 2 st*, repeat ** across til last st, single puff in last st
Row 9: (color B) ch 1, puff st in the ch 1 space, ch 1, puff in same ch 1 space, repeat in the ch 1 spaces across
Row 10: (Switch to color A) Ch 1, HDC across
Row 11: (color A) Ch 1, HDC across
Fasten off. Cut off yarn and leave a 12” tail. Lay out your headband with the right side facing up, then interlock the ends so that they fit into one another, they kinda look like a C and a backwards C, or like one S. Use your yarn needle and whip stitch the ends together, while making sure to sew into each layer. When you reach the end, secure your yarn with a few knots and weave in your end.
Flip headband right side out and then it’s completely!
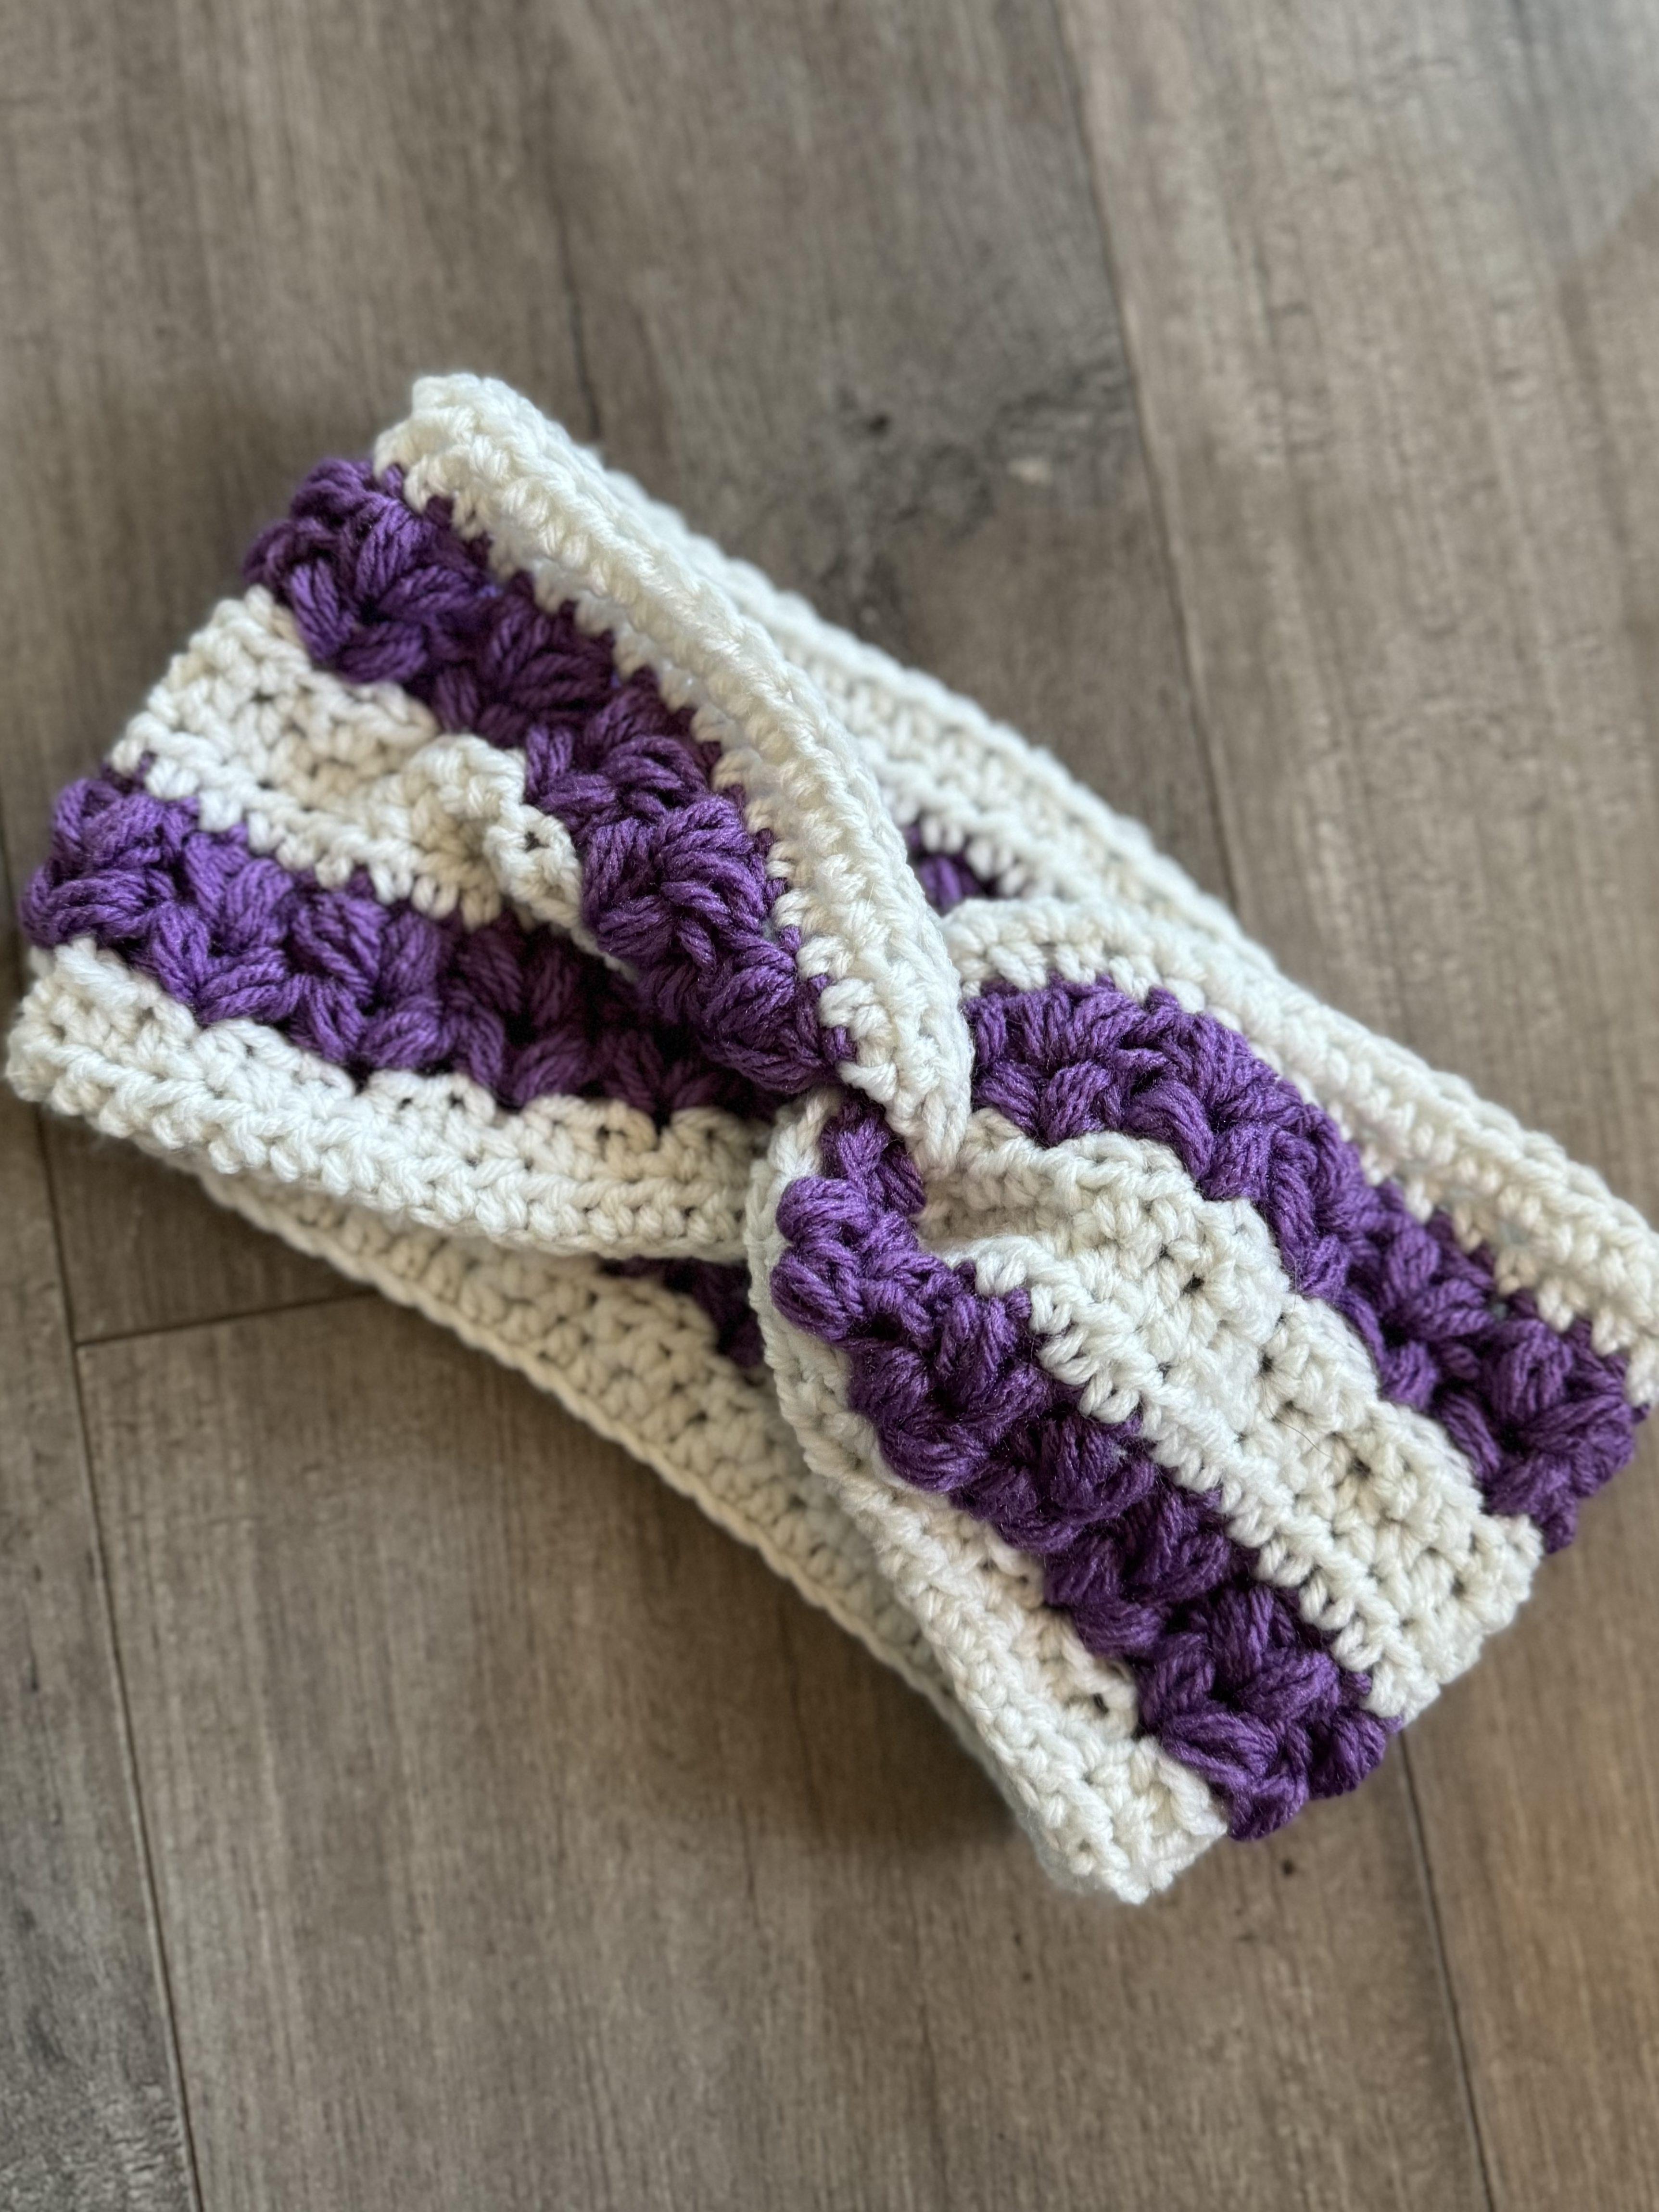
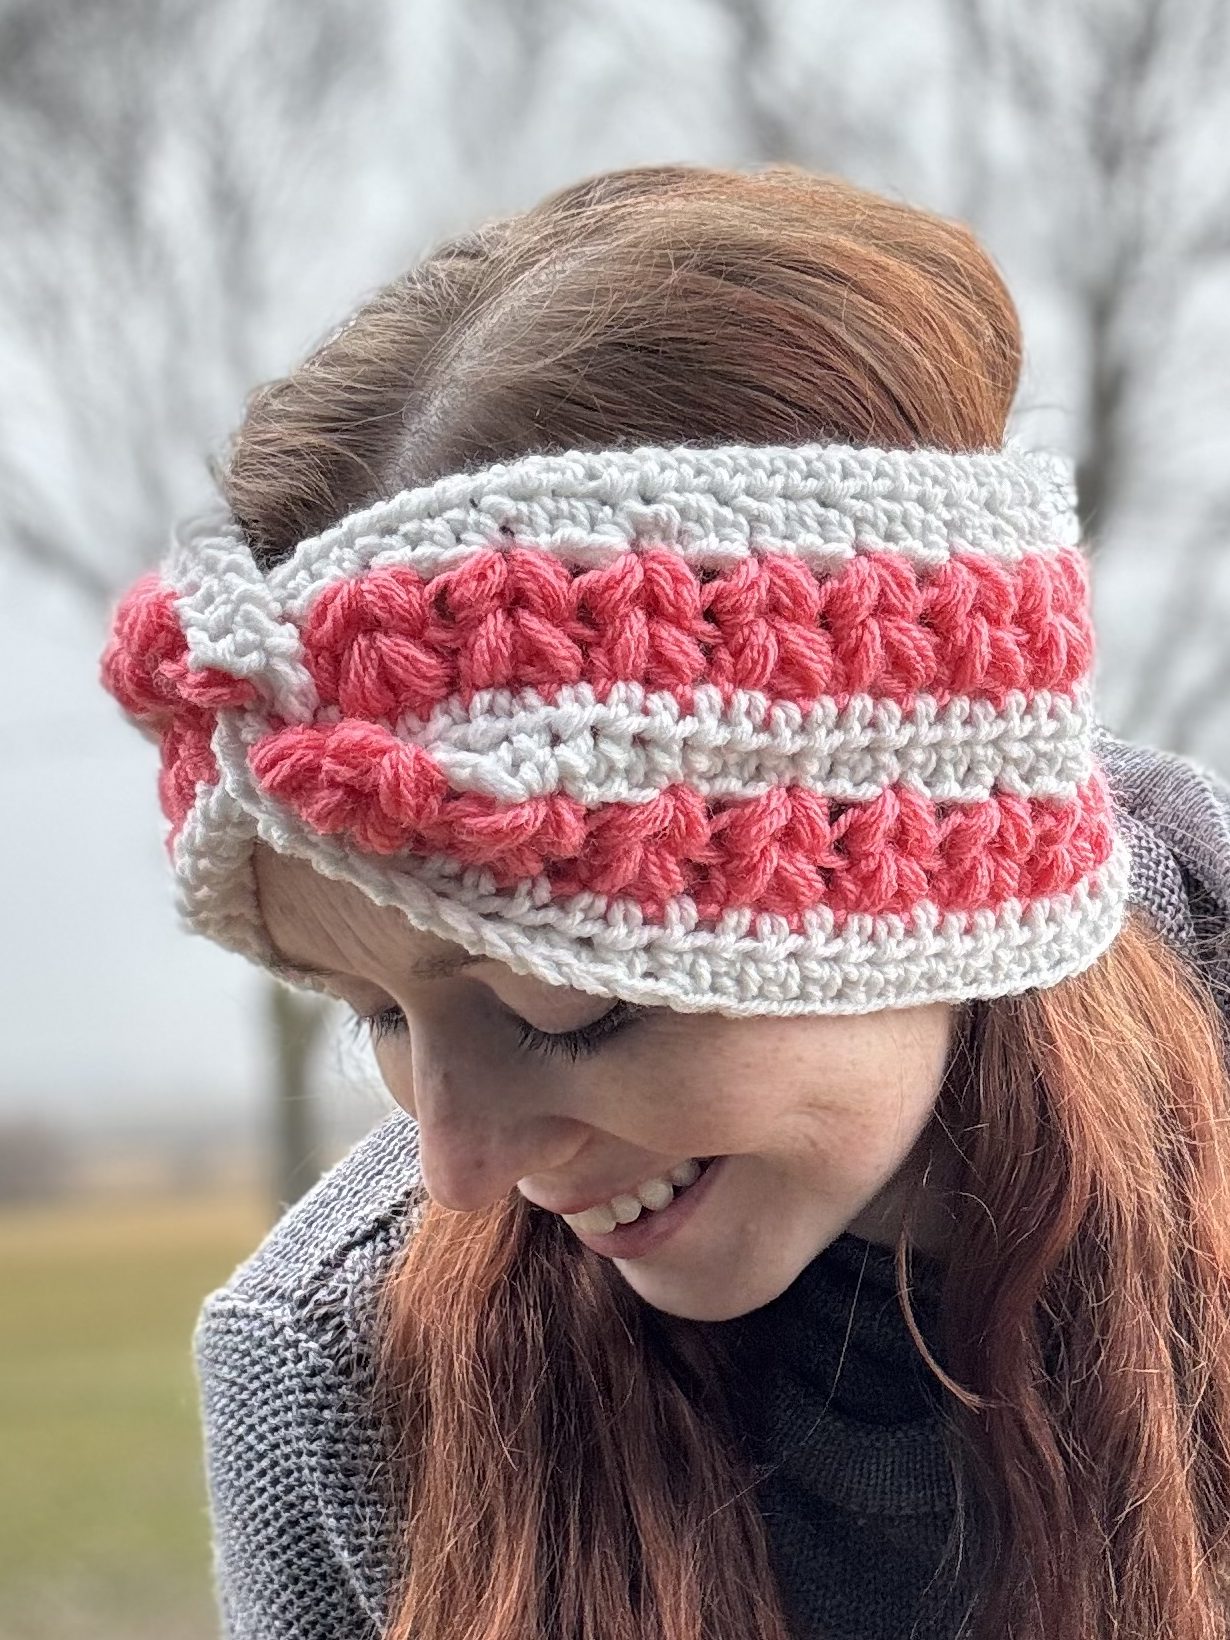
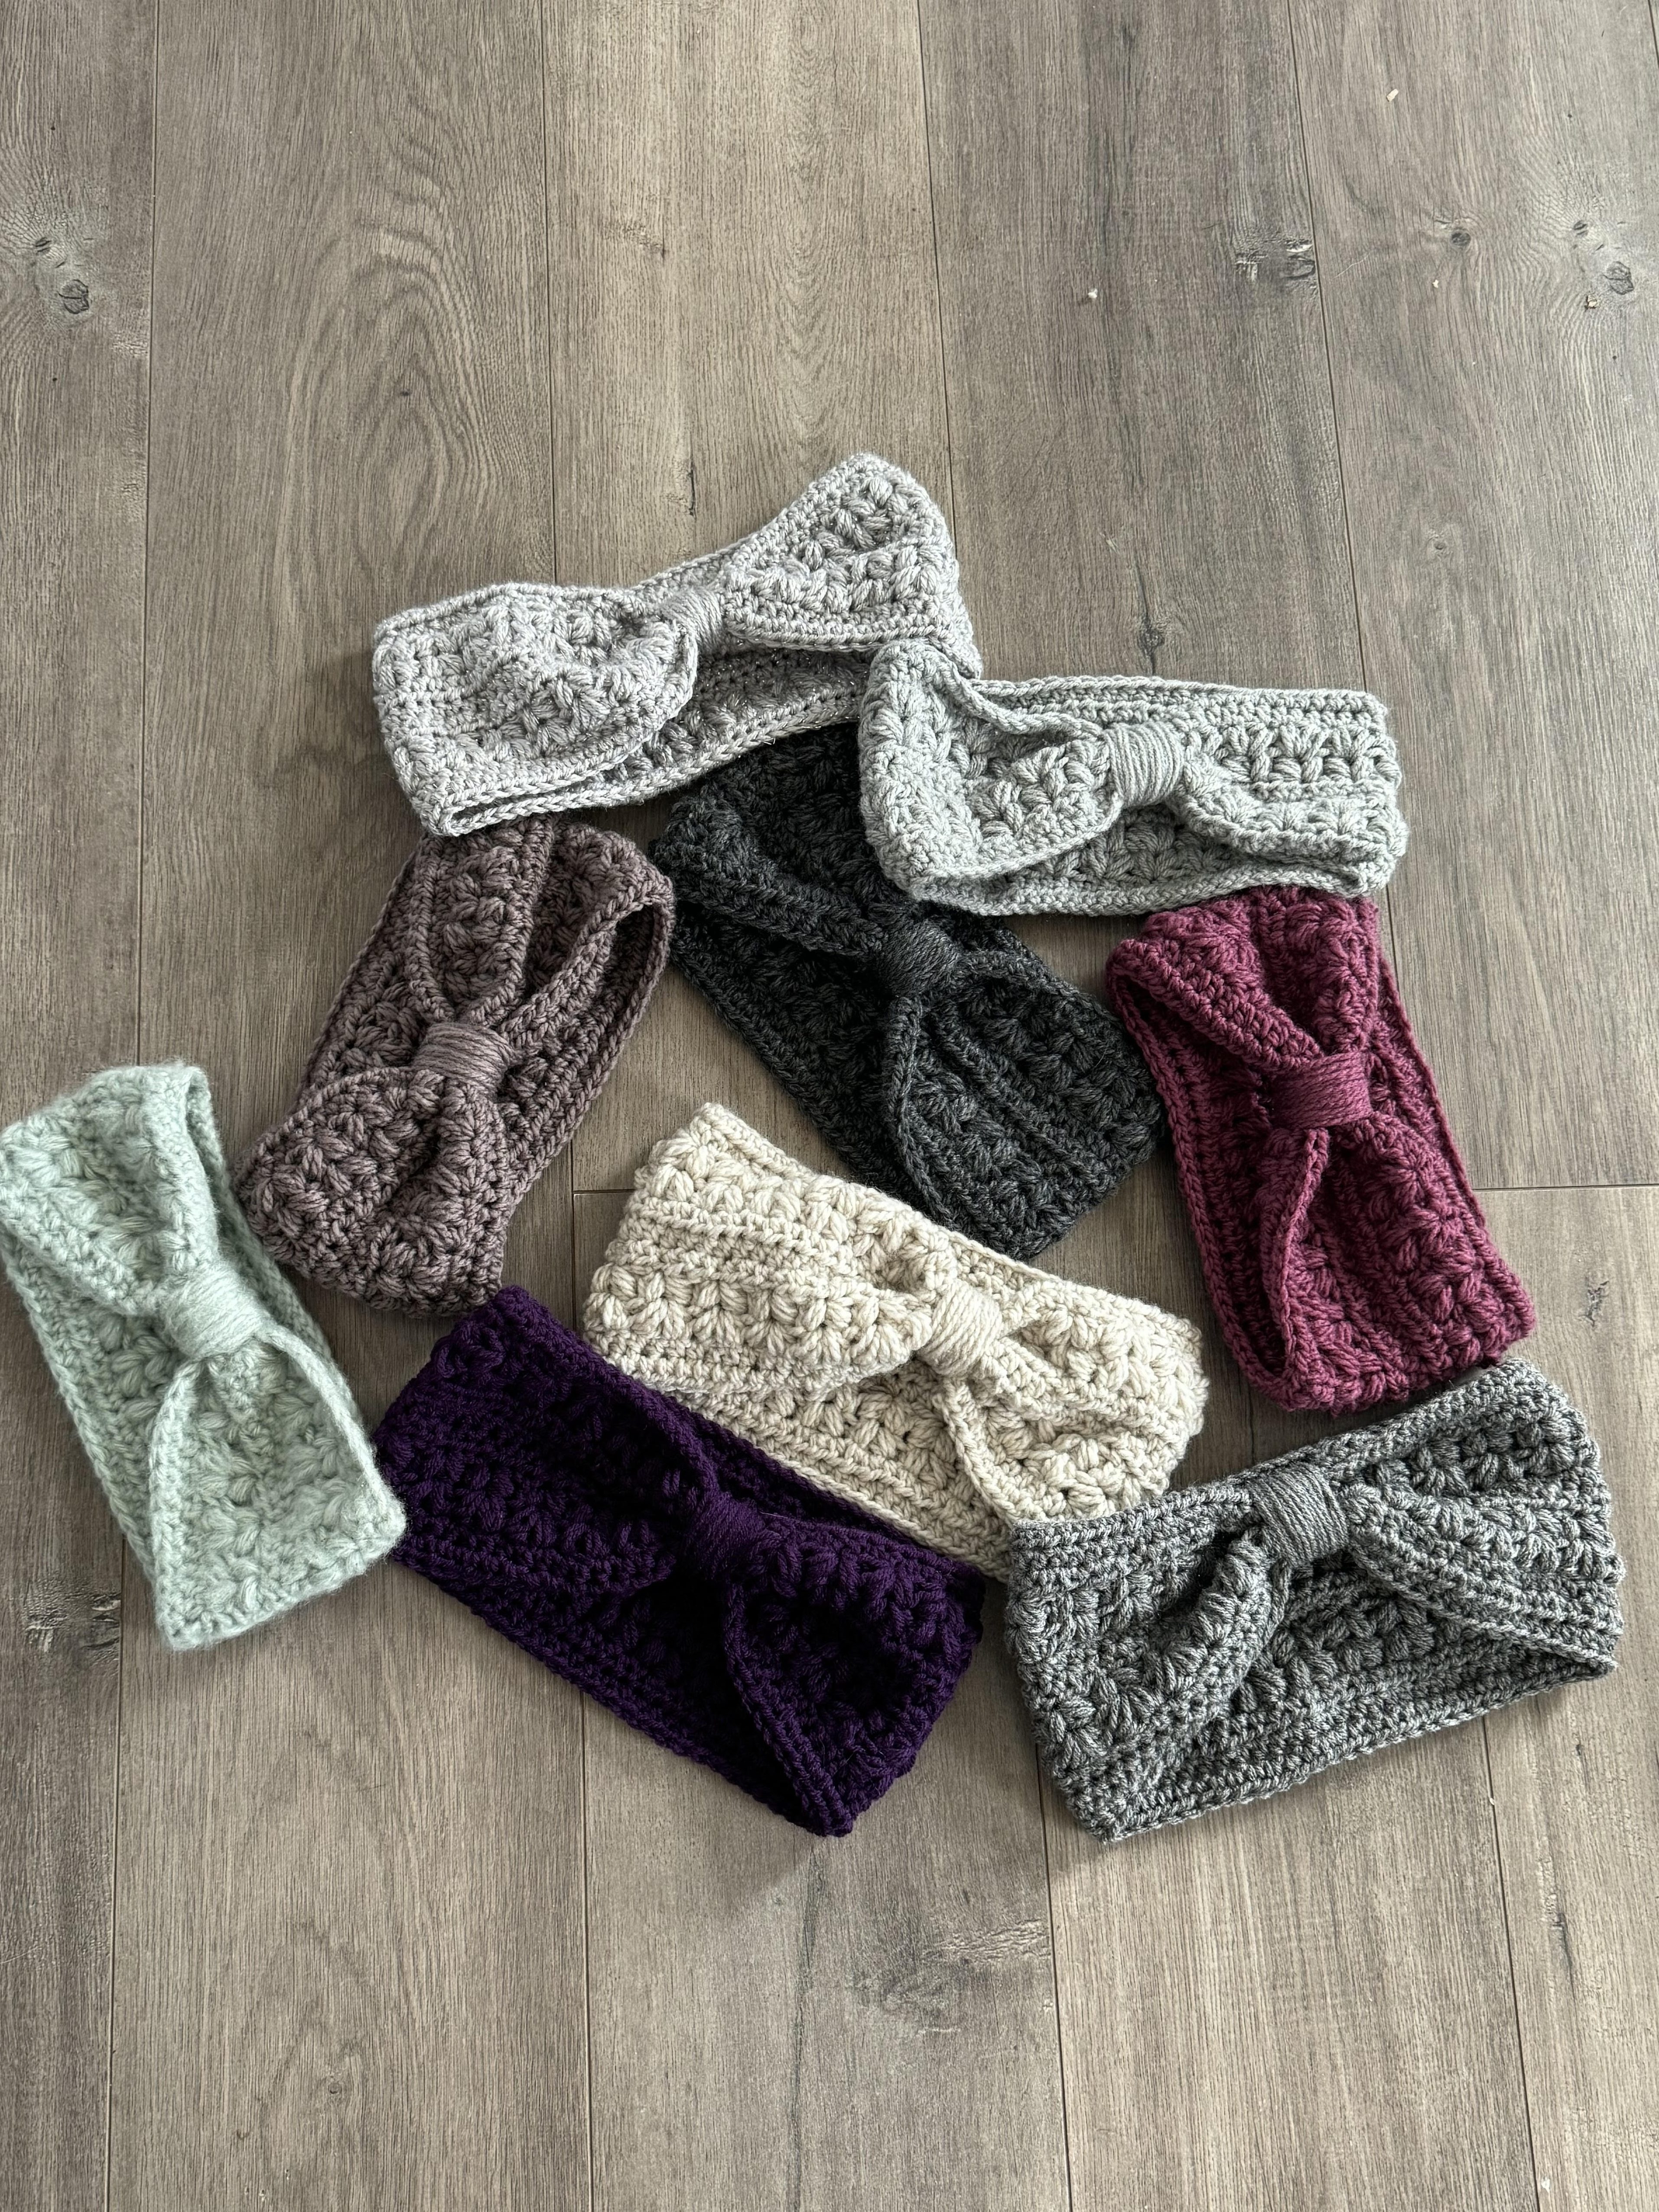
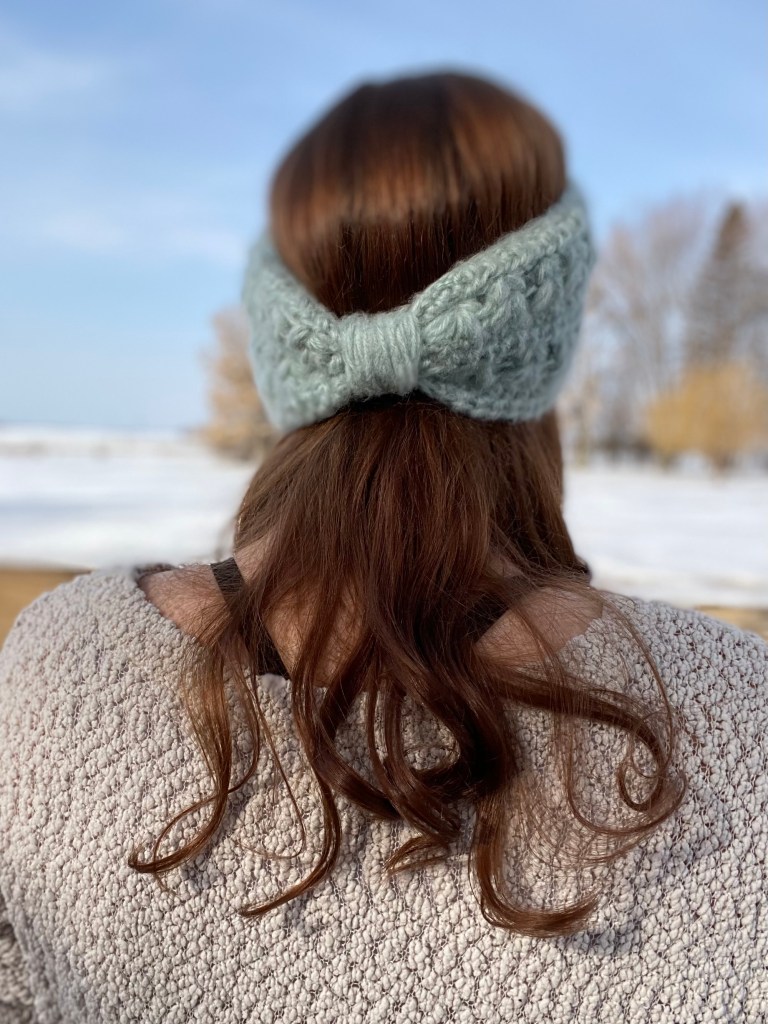
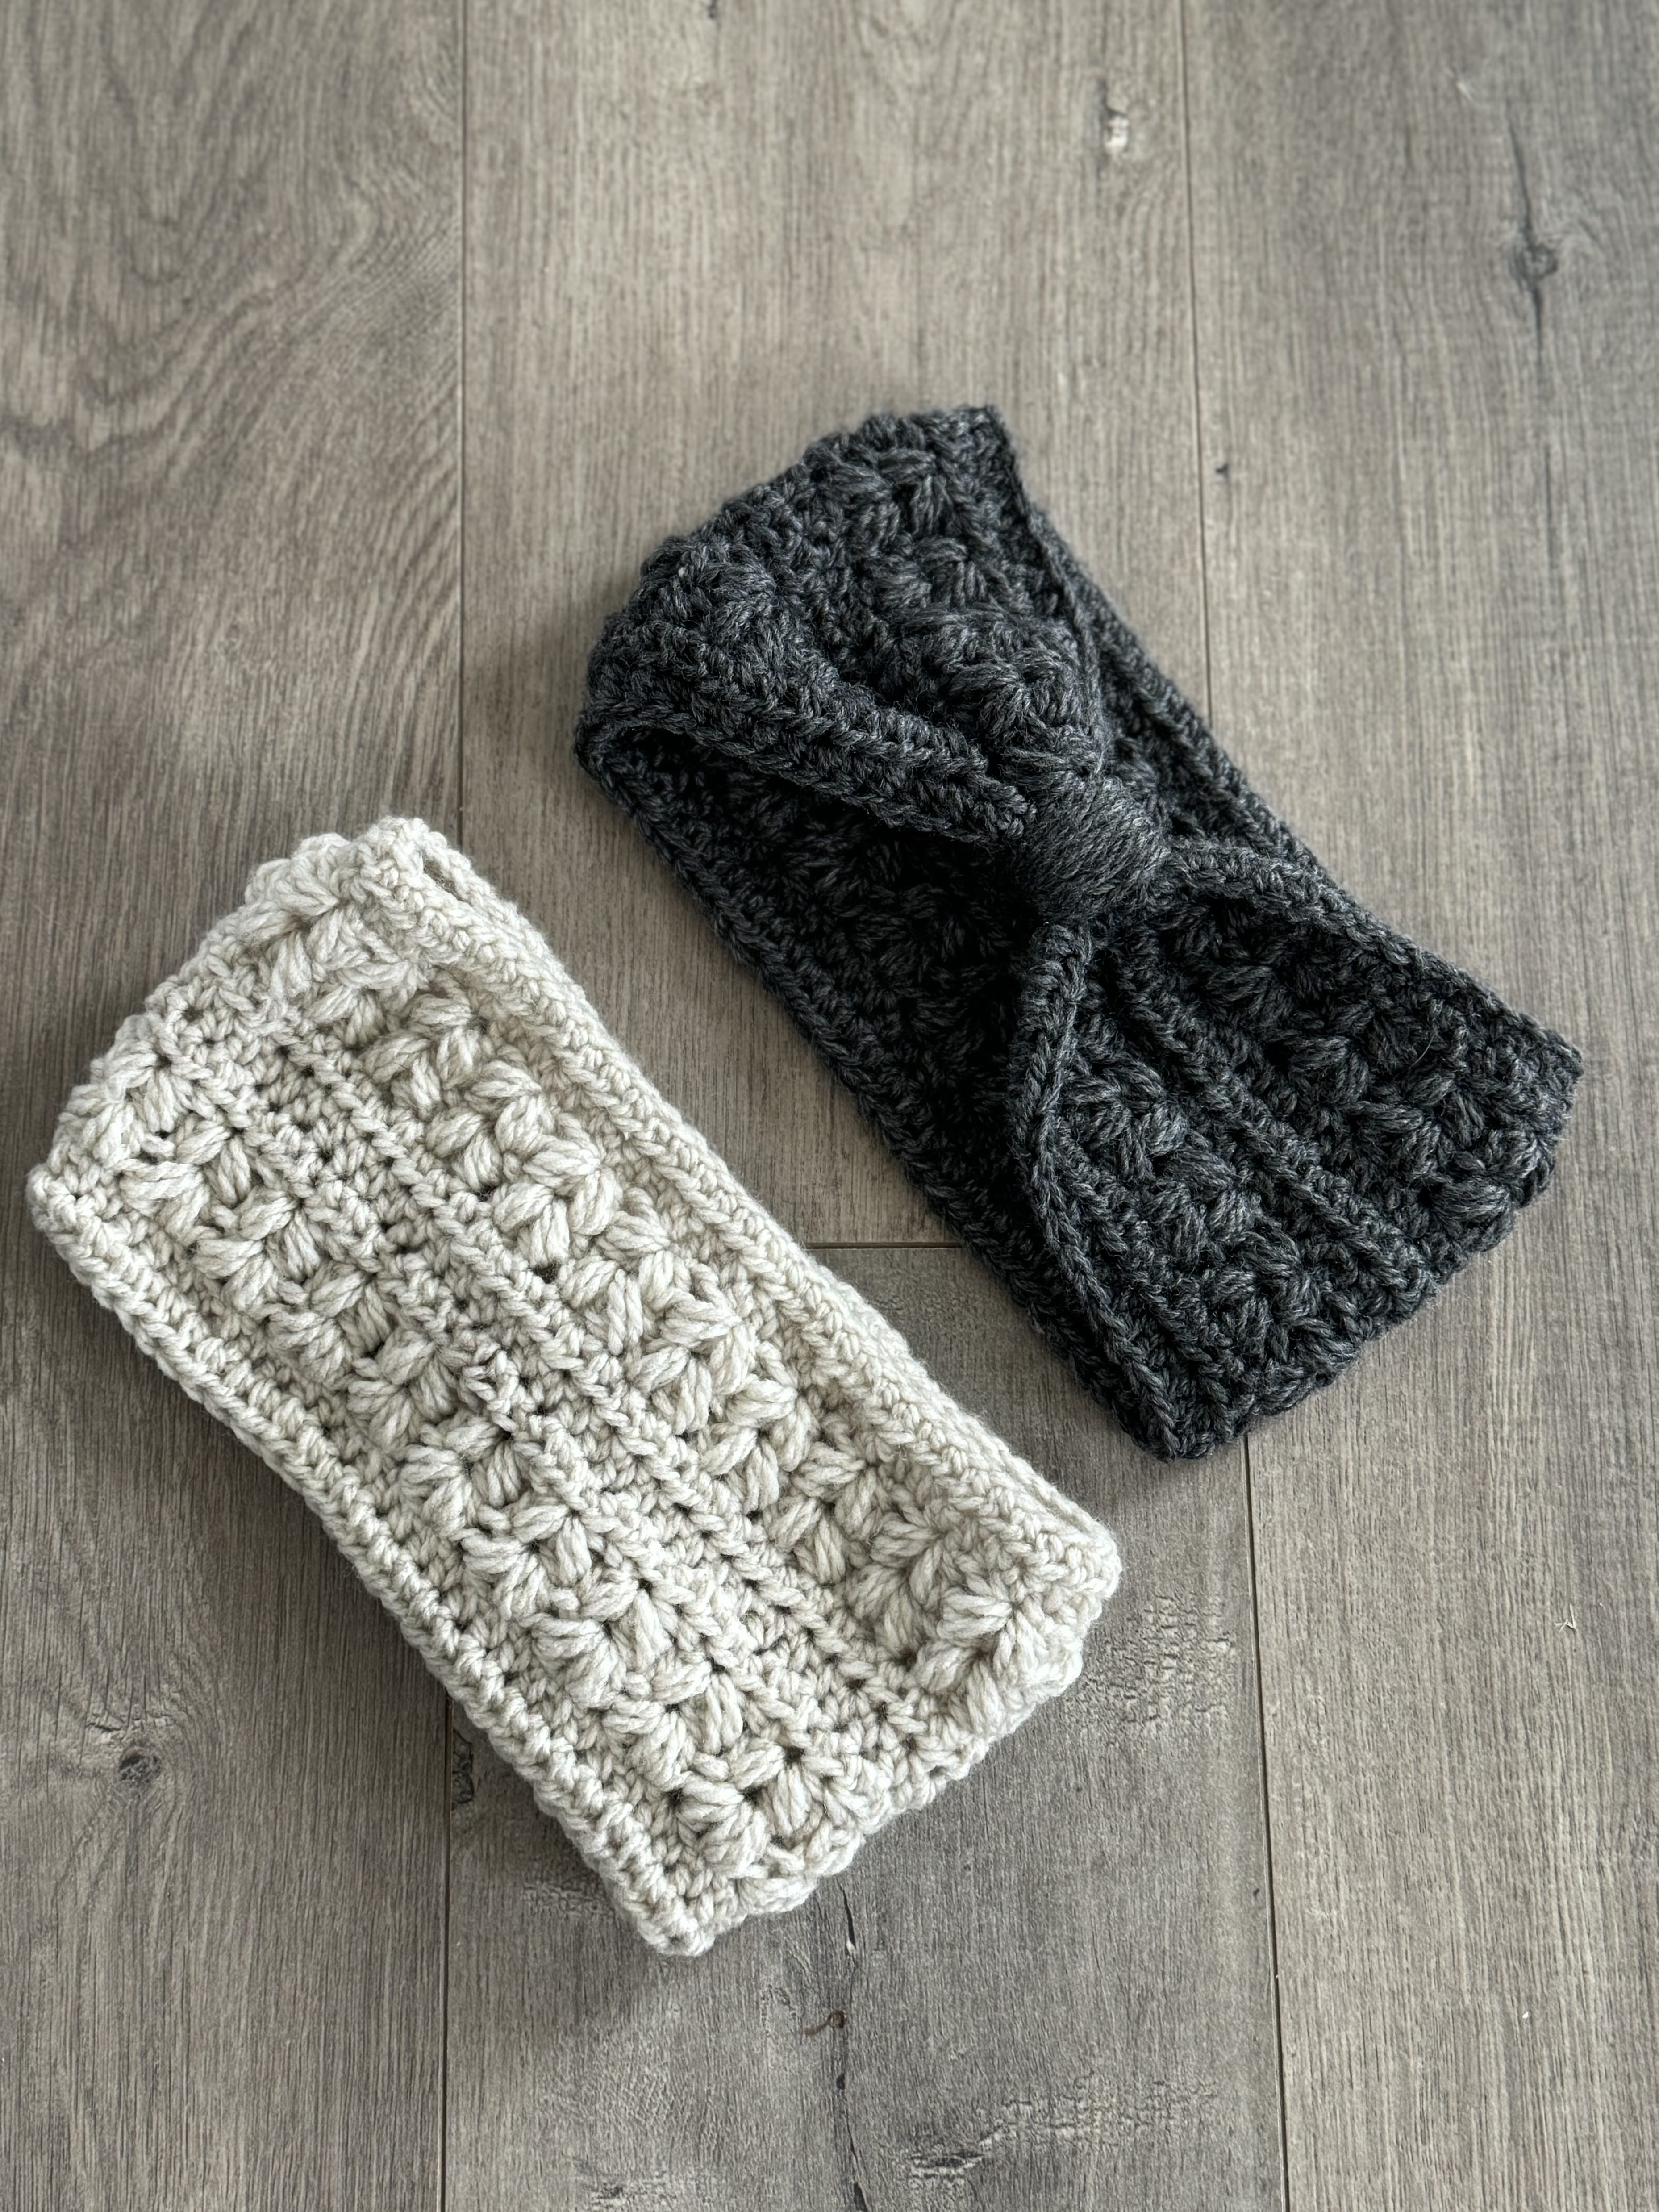
I live in Minnesota so that means I live in winter gear half the year! When I first learned to crochet I made lots of scarves and then it was headbands. It started with very simple patterns and I have finally gotten confident enough in my crocheting that I wrote my own headband pattern! I created this design while my kids napped one day, I am a full time stay at home mom of two toddlers, and crocheting is my escape from the craziness. I timed myself making this headband and it took about 40 minutes so its also the perfect project to do while your kids nap!
Materials:
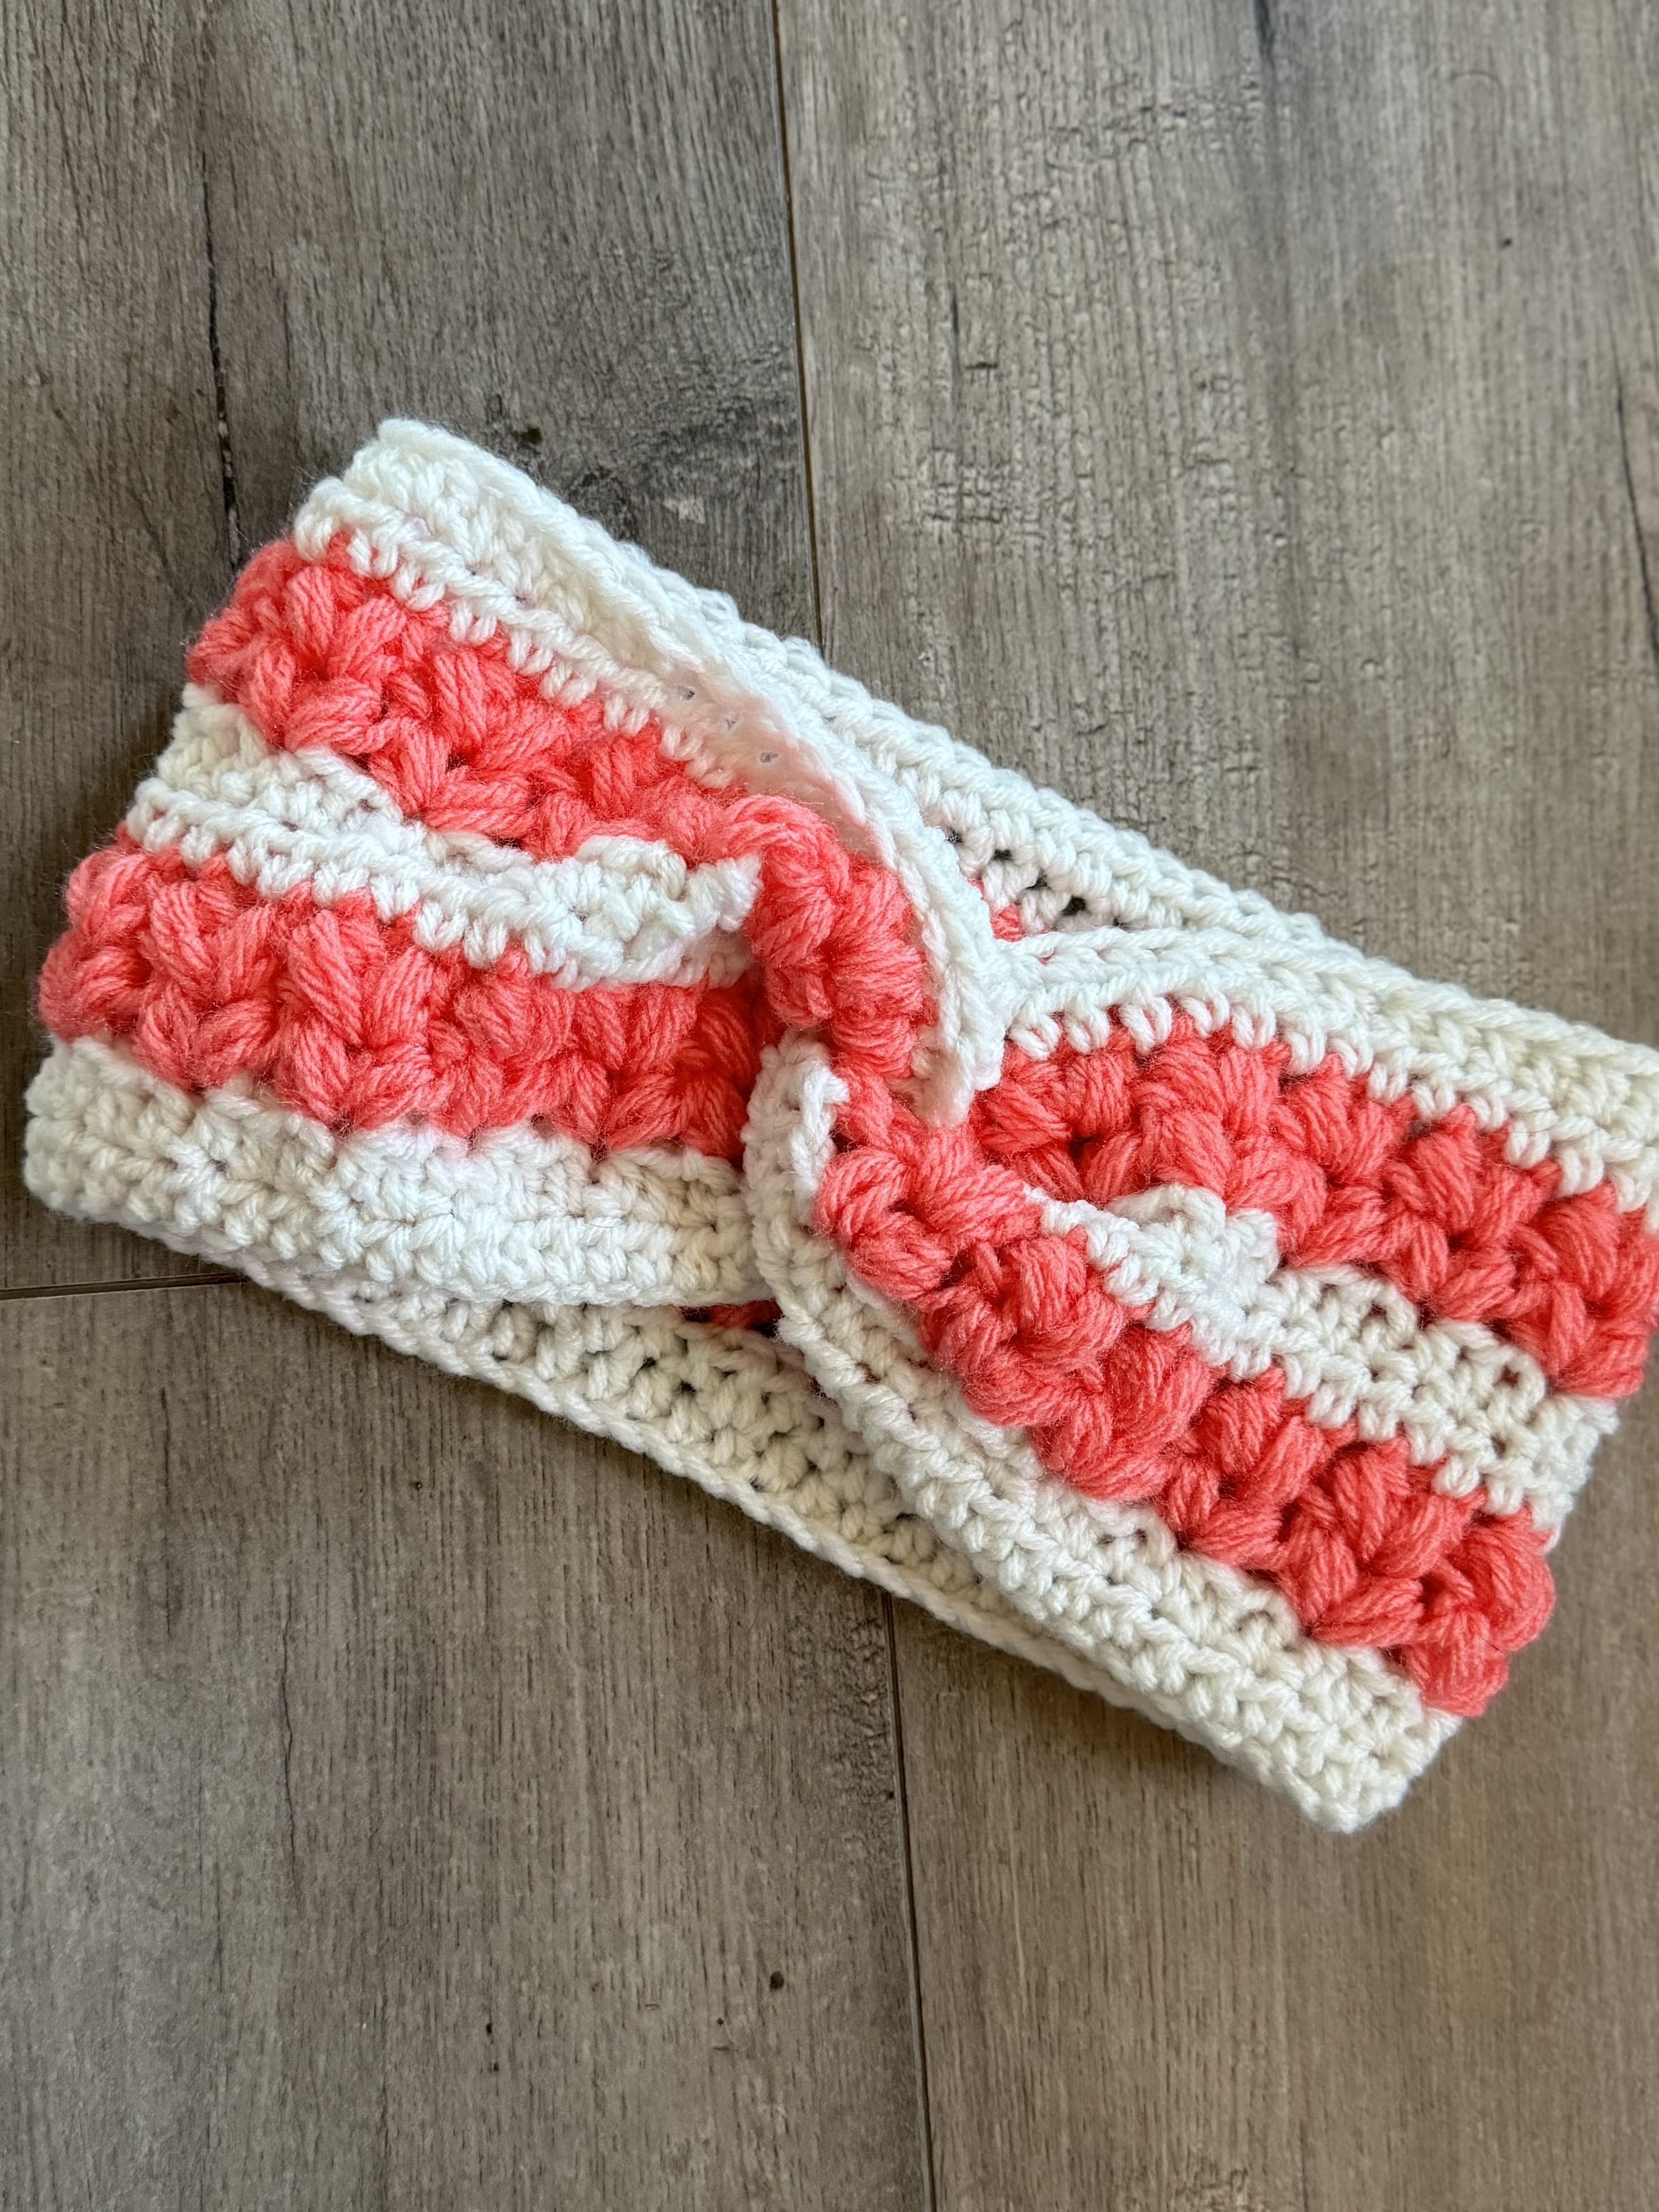
Worsted weighted yarn (In first photo I used ‘Red Heart Super Saver Brushed Teal Pastel’ yarn.)
I/5.50mm hooks
Yarn needle
Notes:
US crochet terms used in this pattern
Sample size is for women but can easily be altered to fit any head size by just measuring head circumference and adjusting the chain length.
Stitches Used:
Ch – Chain
HDC – Half double crochet
Puff stitch/pf – YO, insert hook in designated st, **yo and pull up a loop, yo. Insert hook into same st) repeat ** 3 times. 7 loops on the hook and yo and pull through all loops on hook
Pattern:
Chain 75 or whatever size wraps around your head circumference
Row 1: HDC across, turn
Row2: Ch 1, HDC across, turn
Row 3: ch 1, puff stitch in first st, in next st *puff st, ch 1, puff st in same st, sk next 2 st*, repeat ** across til last st, single puff in last st
Row 4: ch 1, puff st in the ch 1 space, ch 1, puff in same ch 1 space, repeat in the ch 1 spaces across
Row 5: Ch 1, HDC across
Row 6: Ch 1, HDC across
Row 7: Ch 1, HDC across
Row 8: ch 1, puff stitch in first st, in next st *puff st, ch 1, puff st in same st, sk next 2 st*, repeat ** across til last st, single puff in last st
Row 9: ch 1, puff st in the ch 1 space, ch 1, puff in same ch 1 space, repeat in the ch 1 spaces across
Row 10: Ch 1, HDC across
Row 11: Ch 1, HDC across
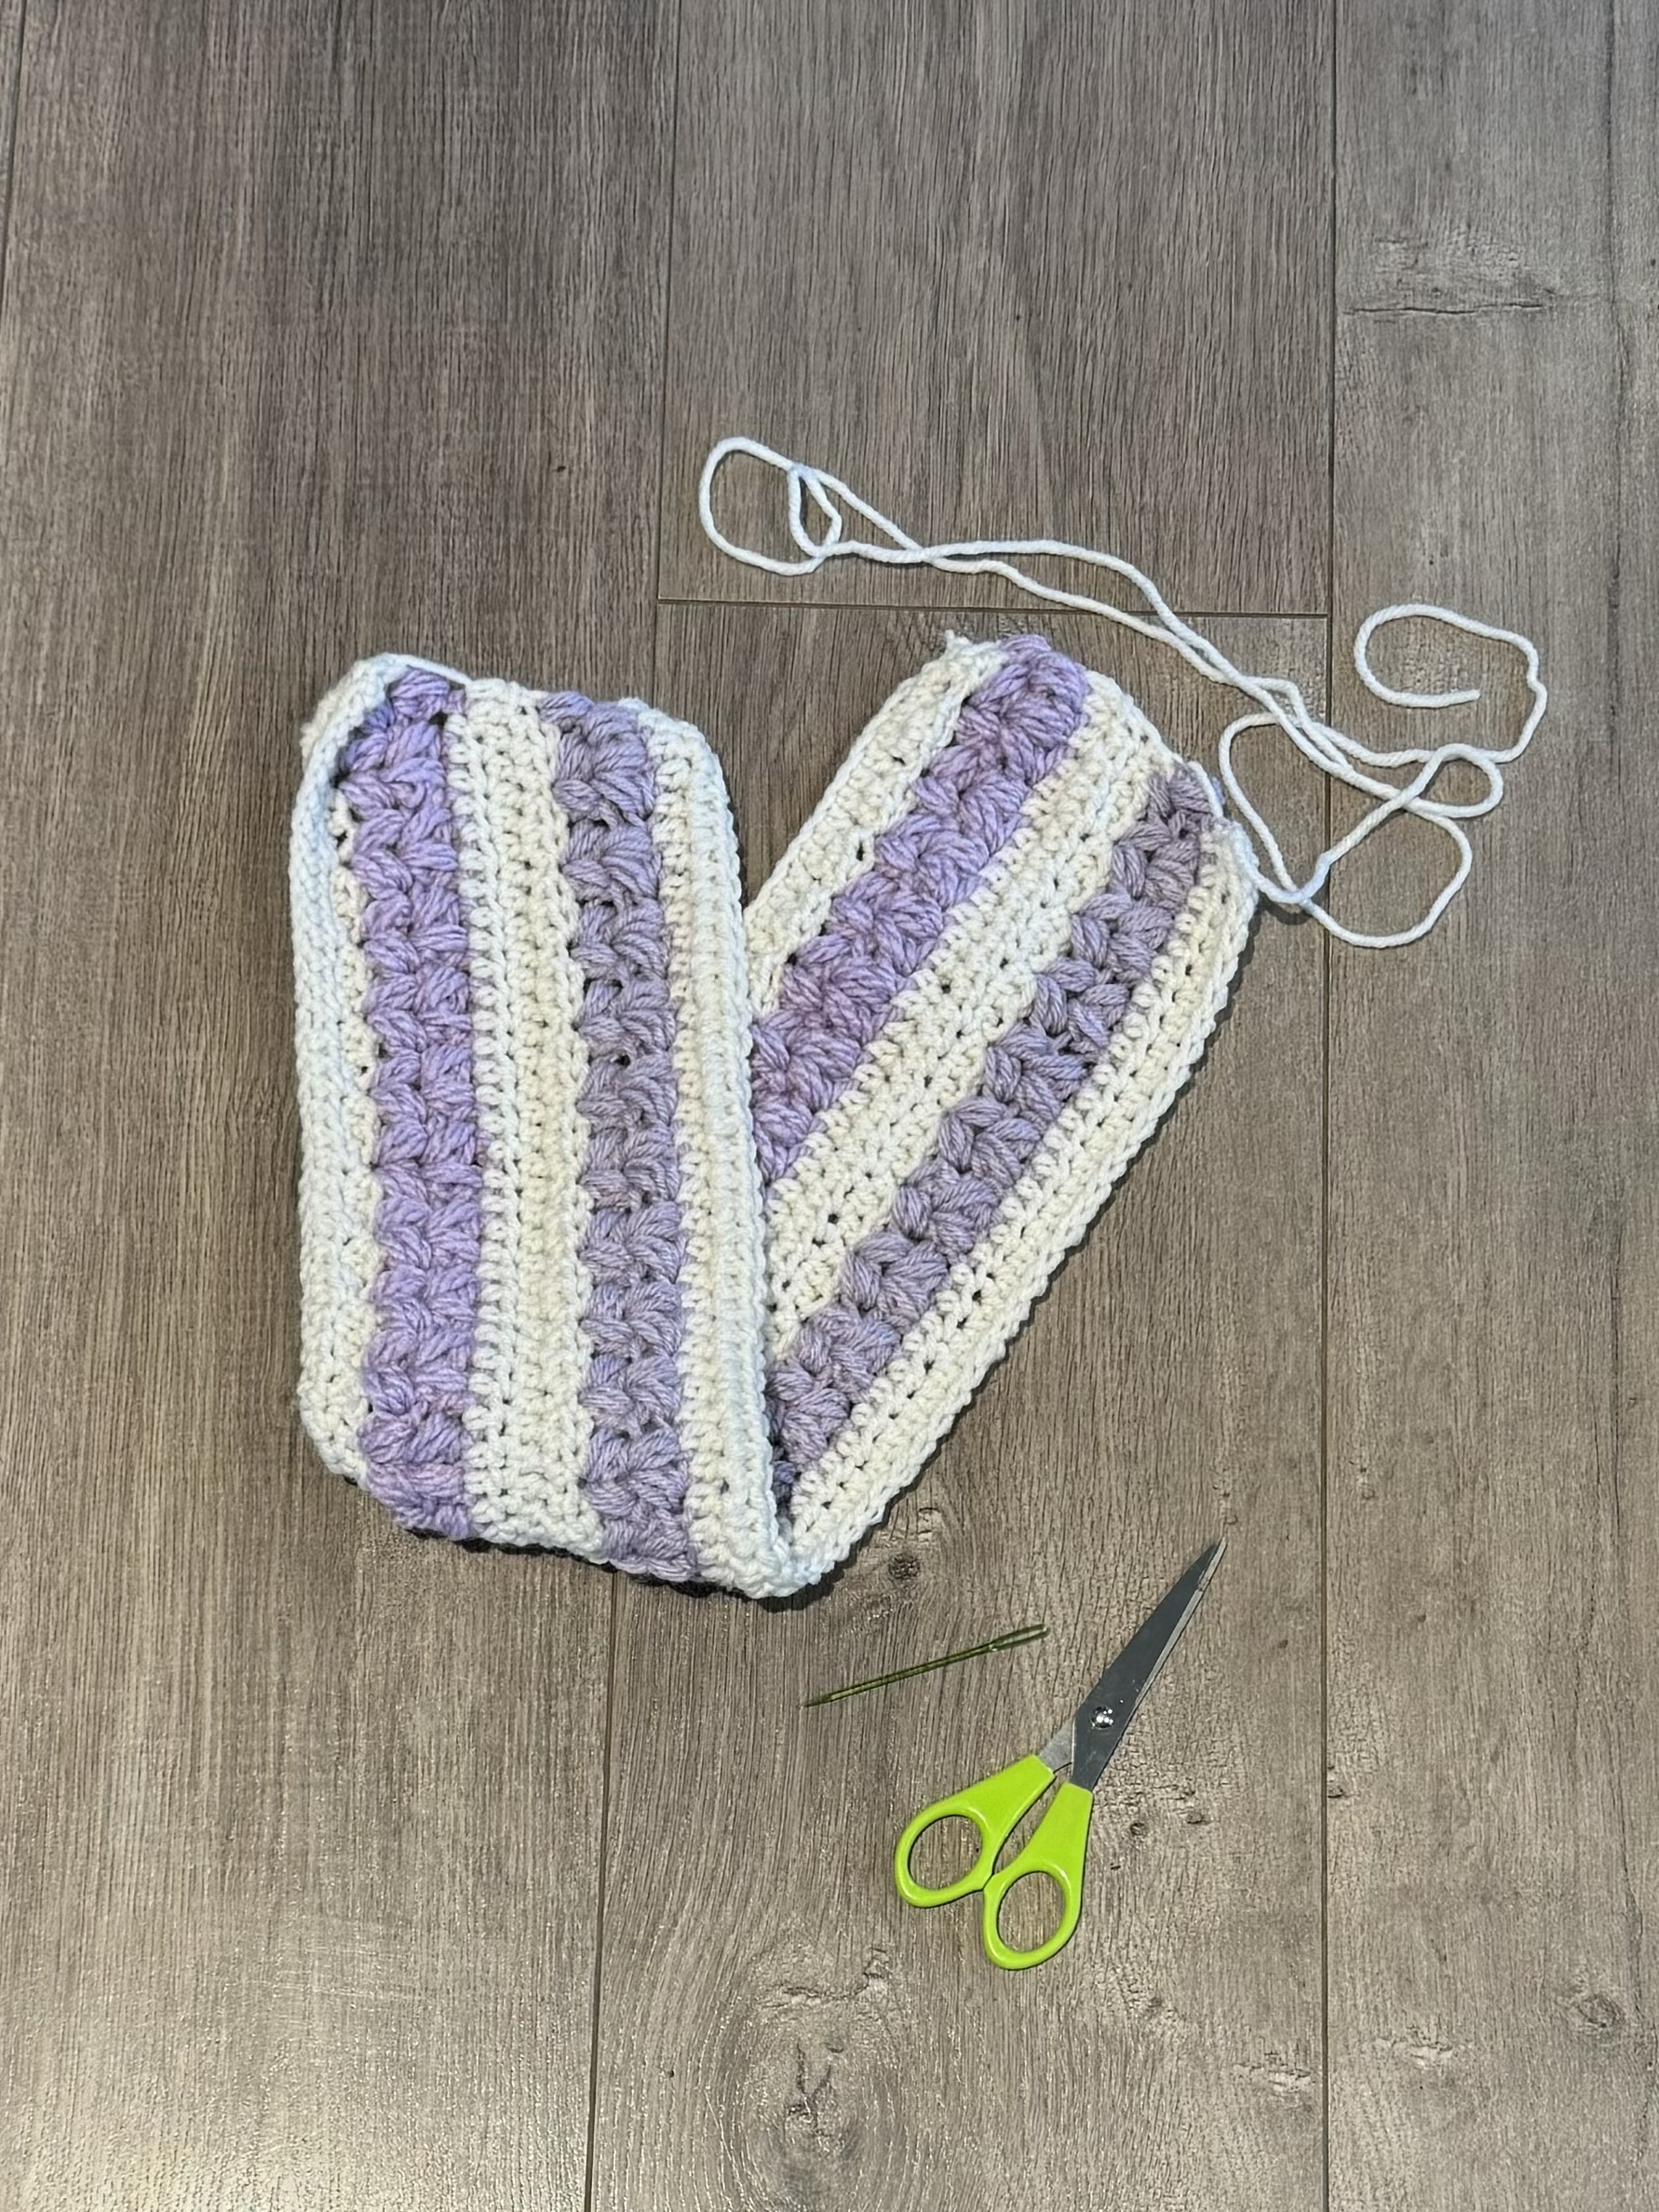
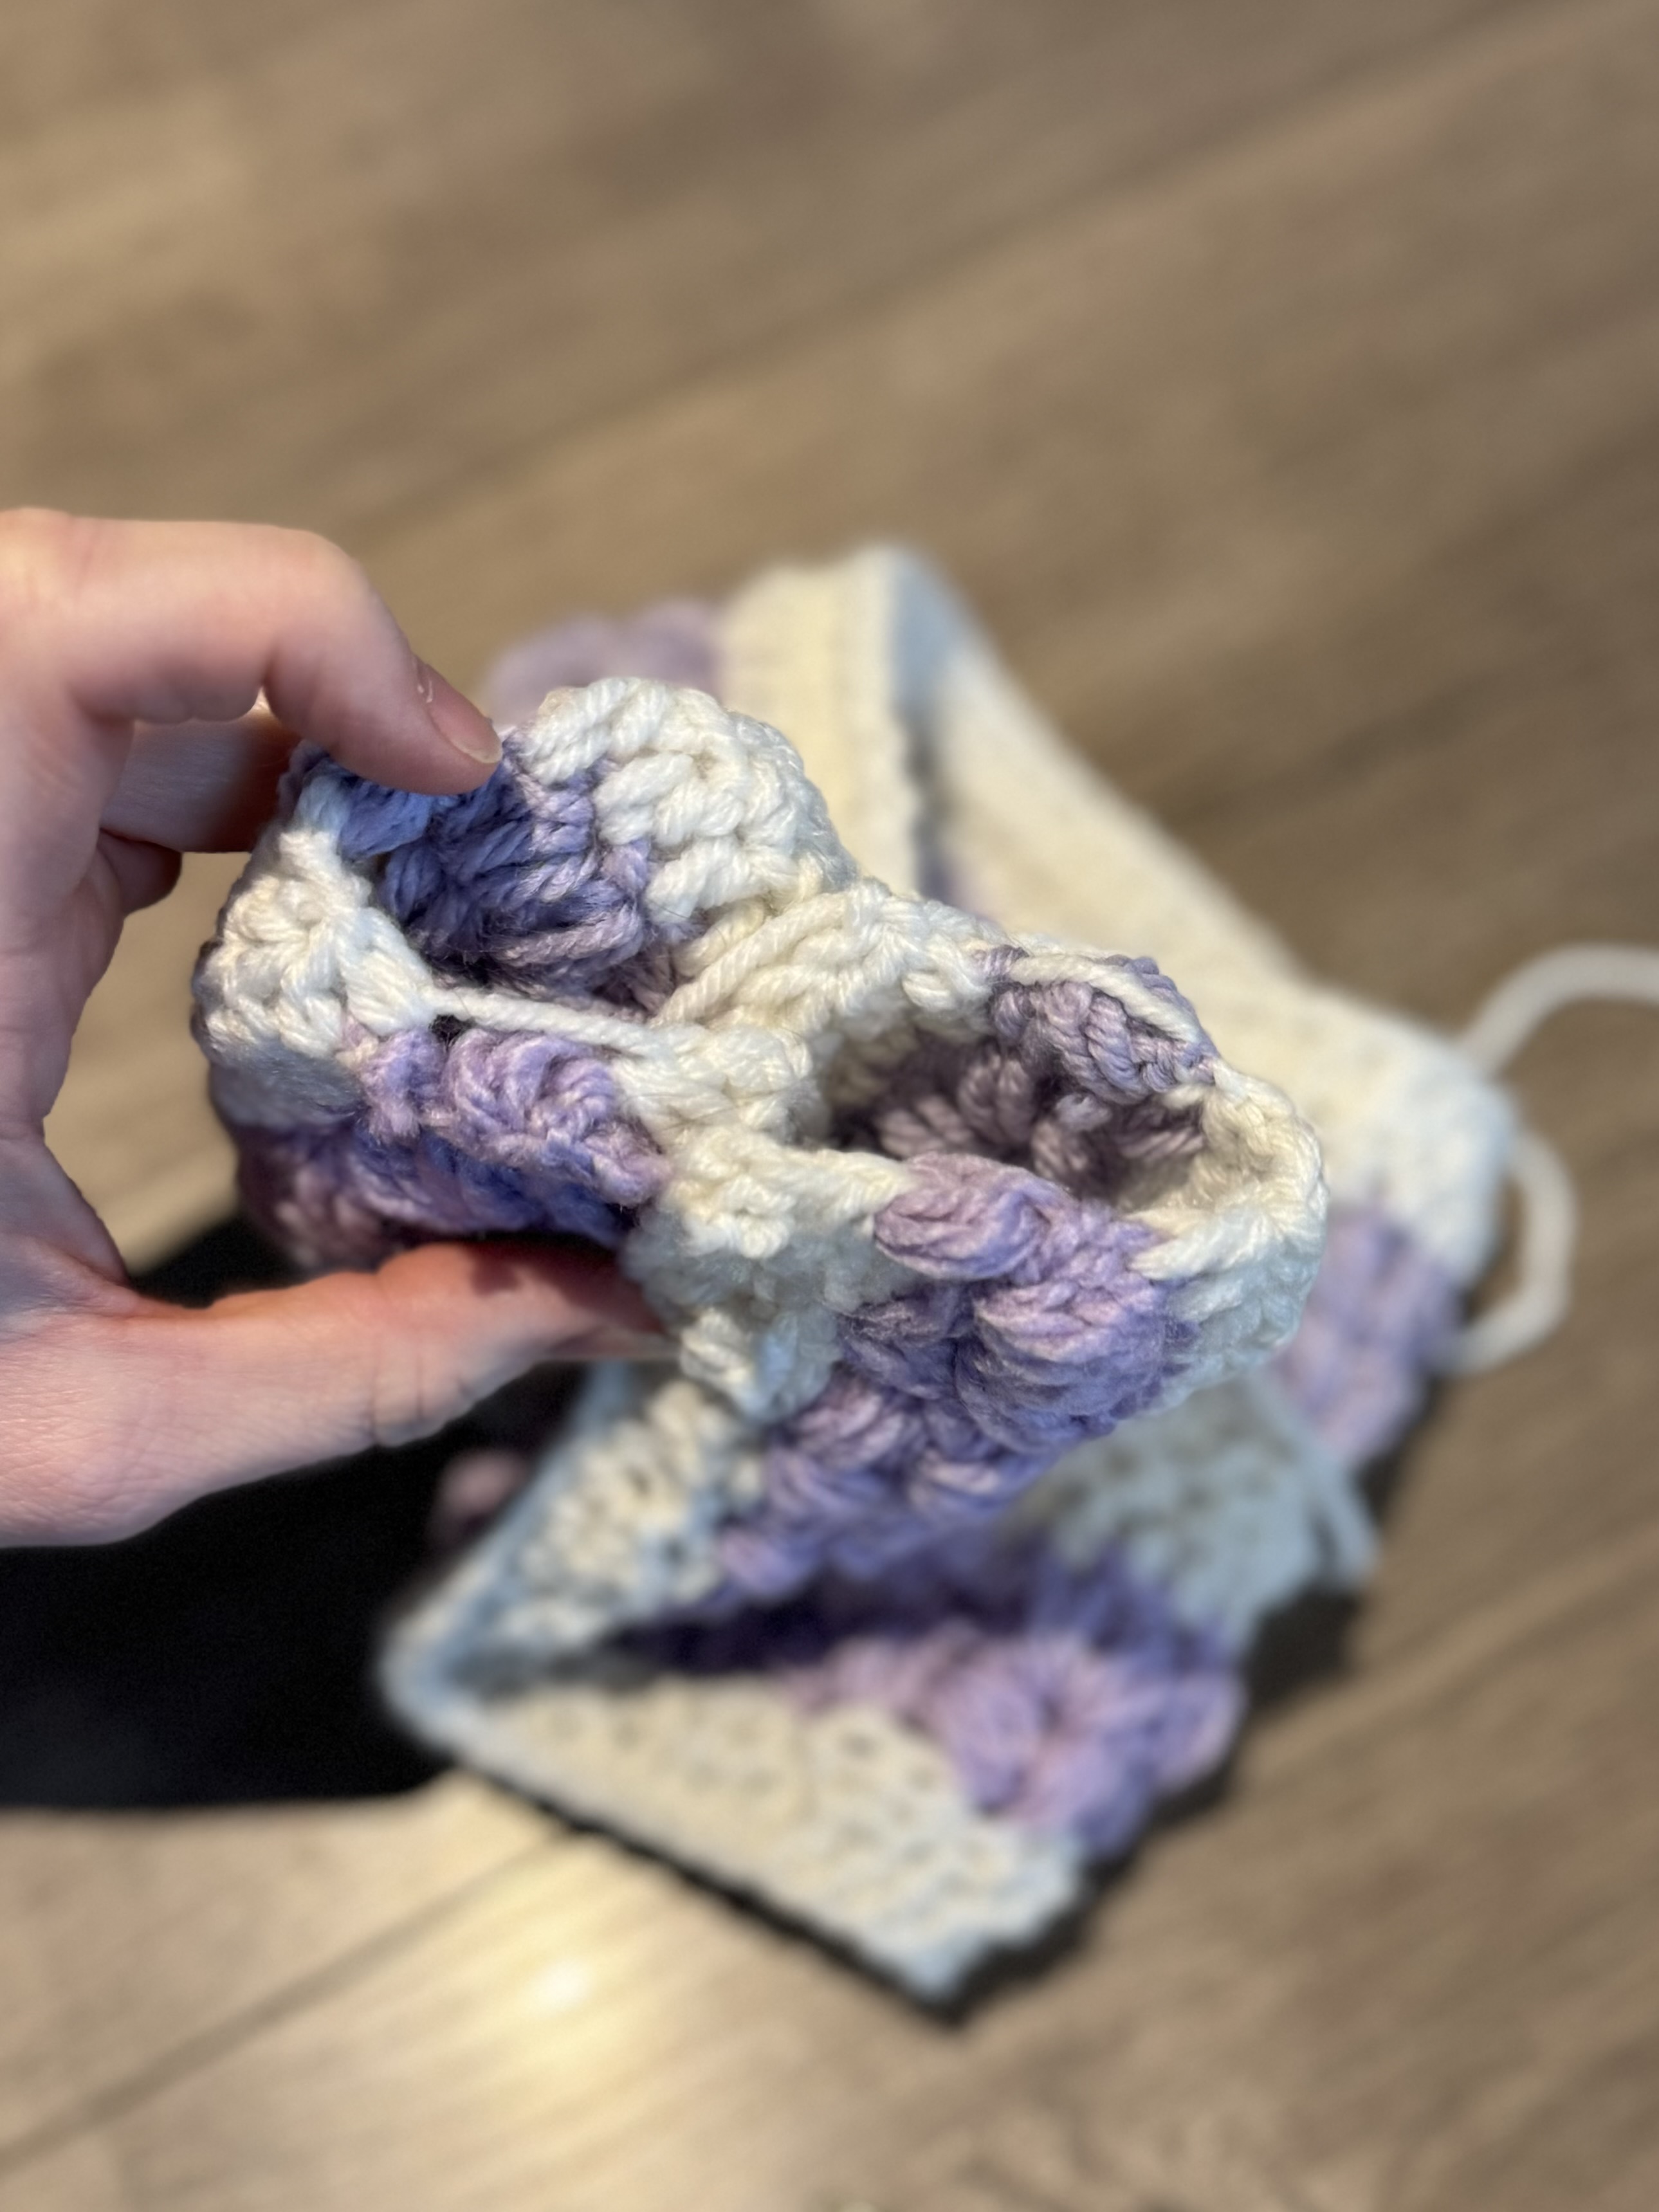
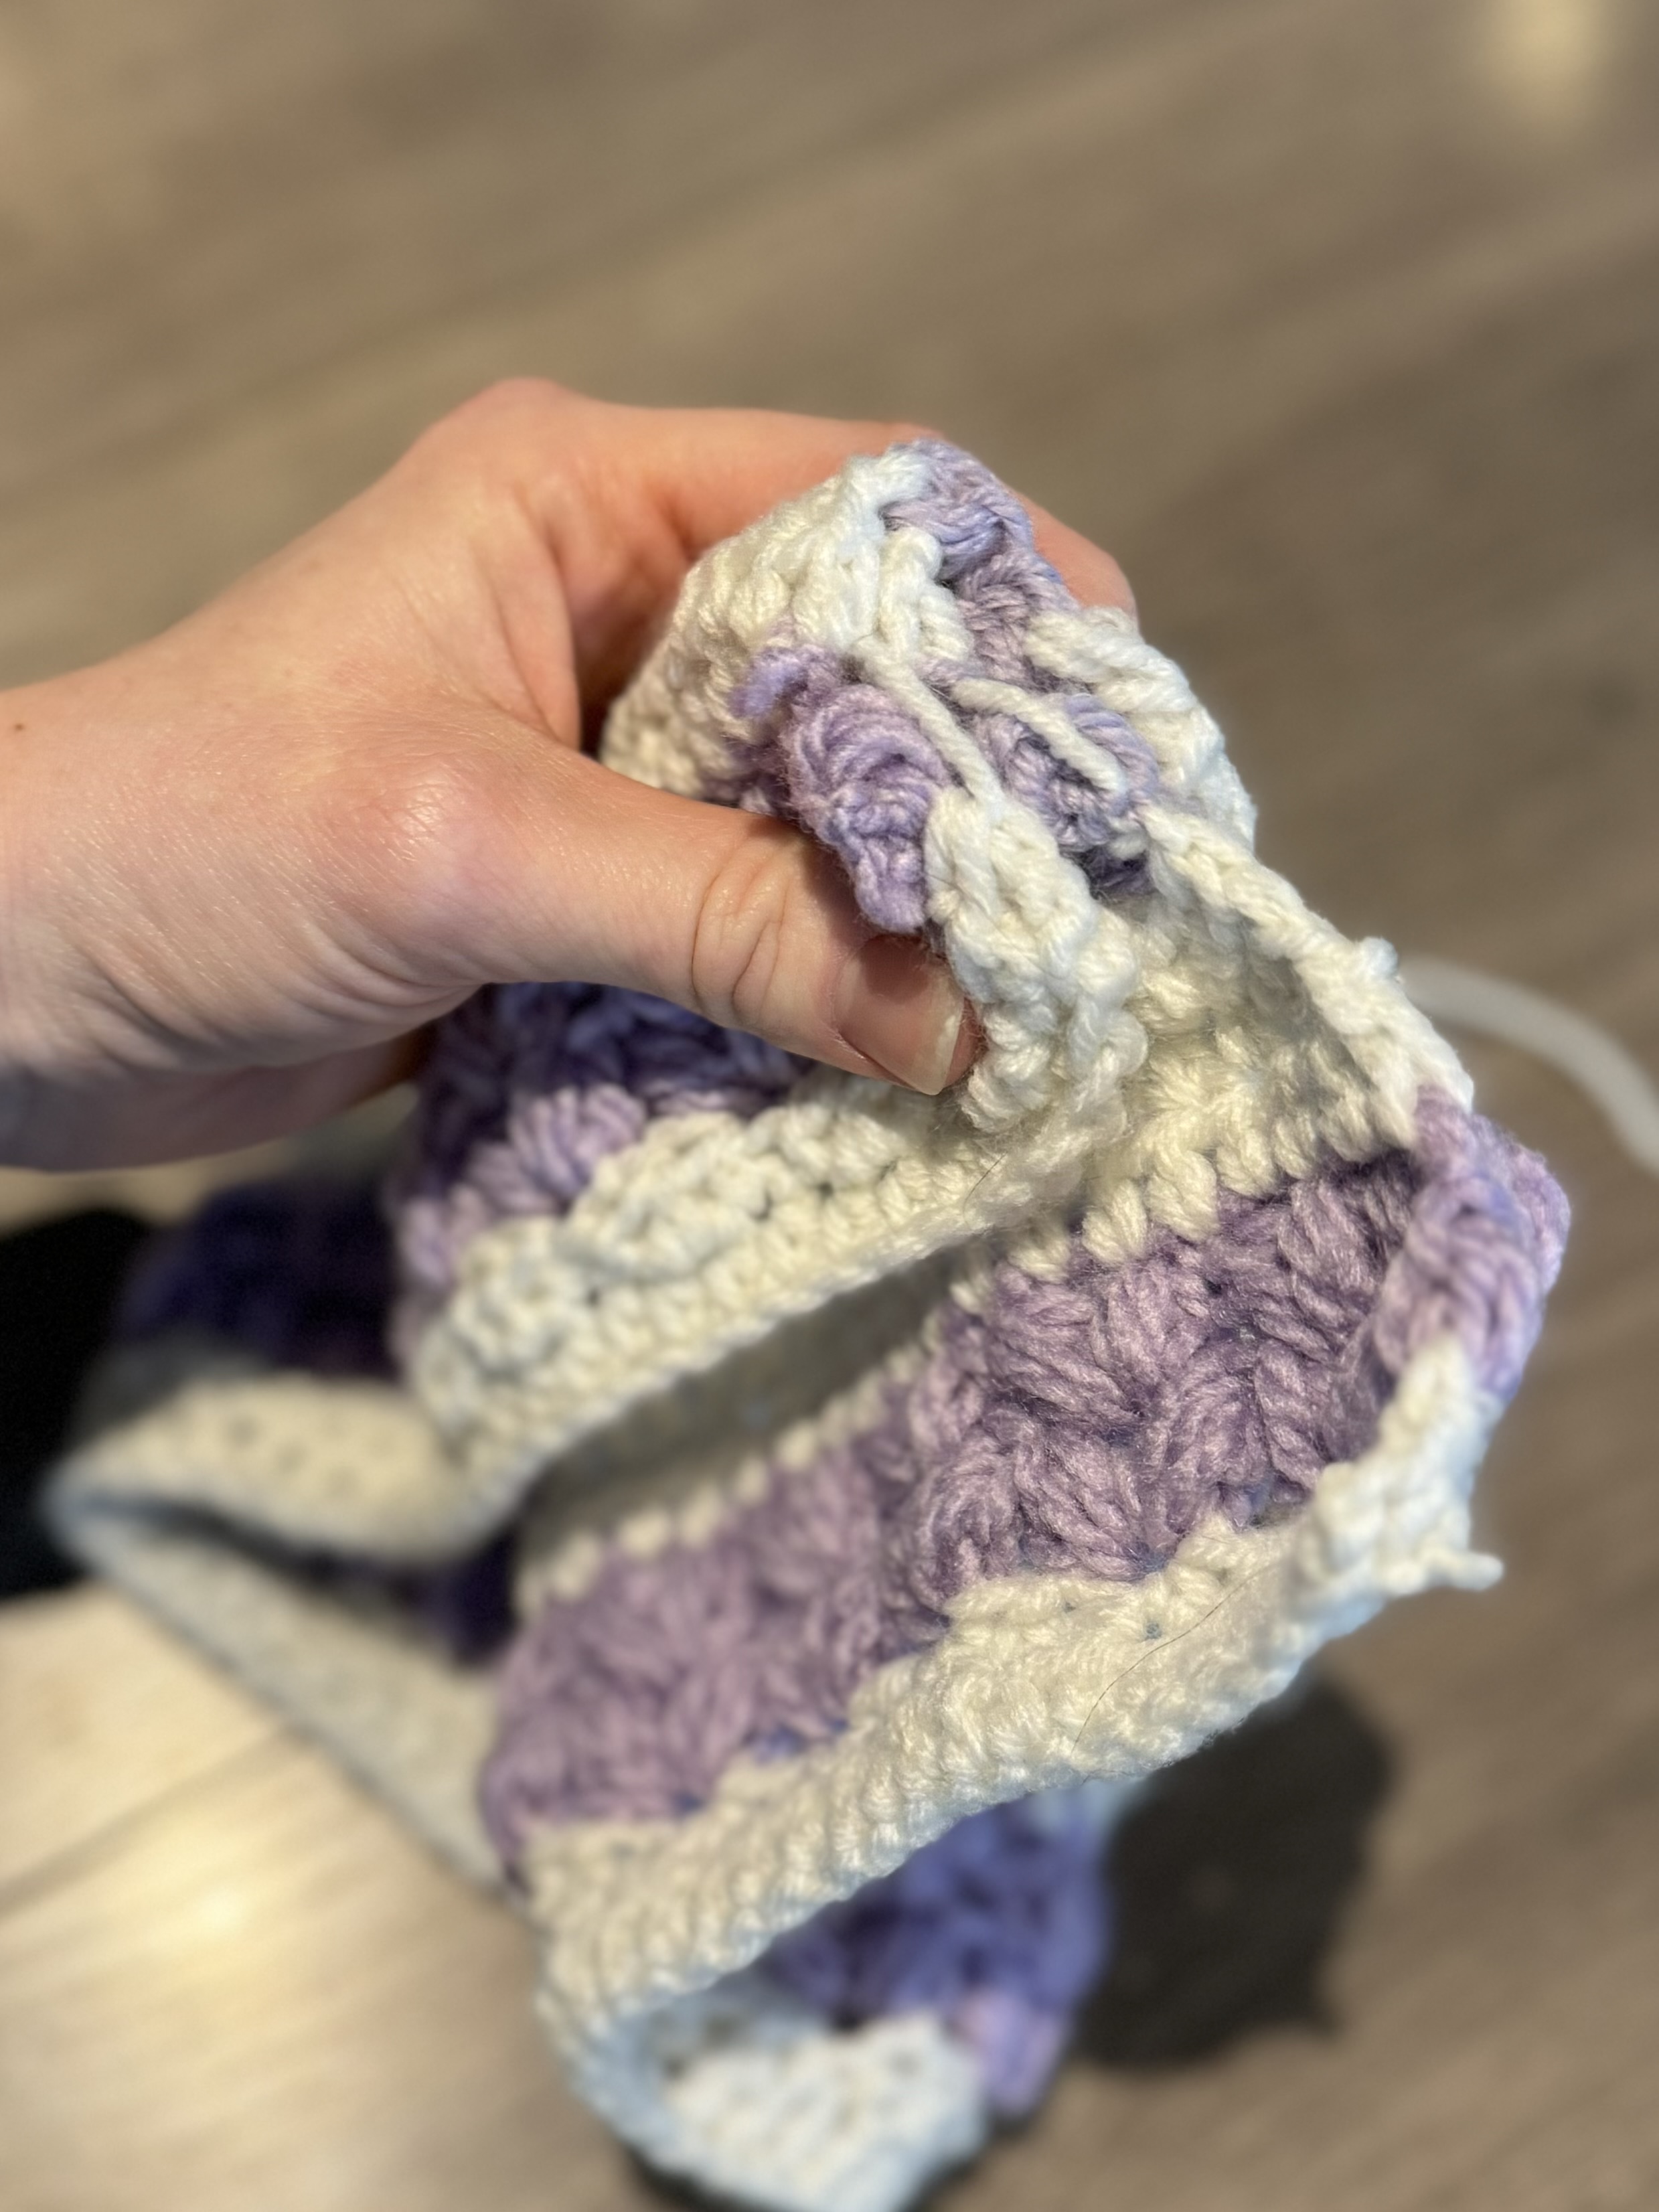
Fasten off, leave a 125 inch tail of yarn. Fold your project in half bringing the ends together. Thread your tail yarn on your needle and work through both layers with a whipstitch across. Once across, pull the yarn tight to cinch the end together more. Knot together the tail yarn and the short tail from the beginning of the project. Take the 125 inch tail and wrap it around the cinch part multiple times till the desired thickness. Tie together with beginning tail, and weave in ends.
I have been crocheting for about 20 years. In more recent years I have branched out and tried new stitches and techniques. I have “created” a few patterns in my phone’s note app but they were only patterns I would understand how to read.
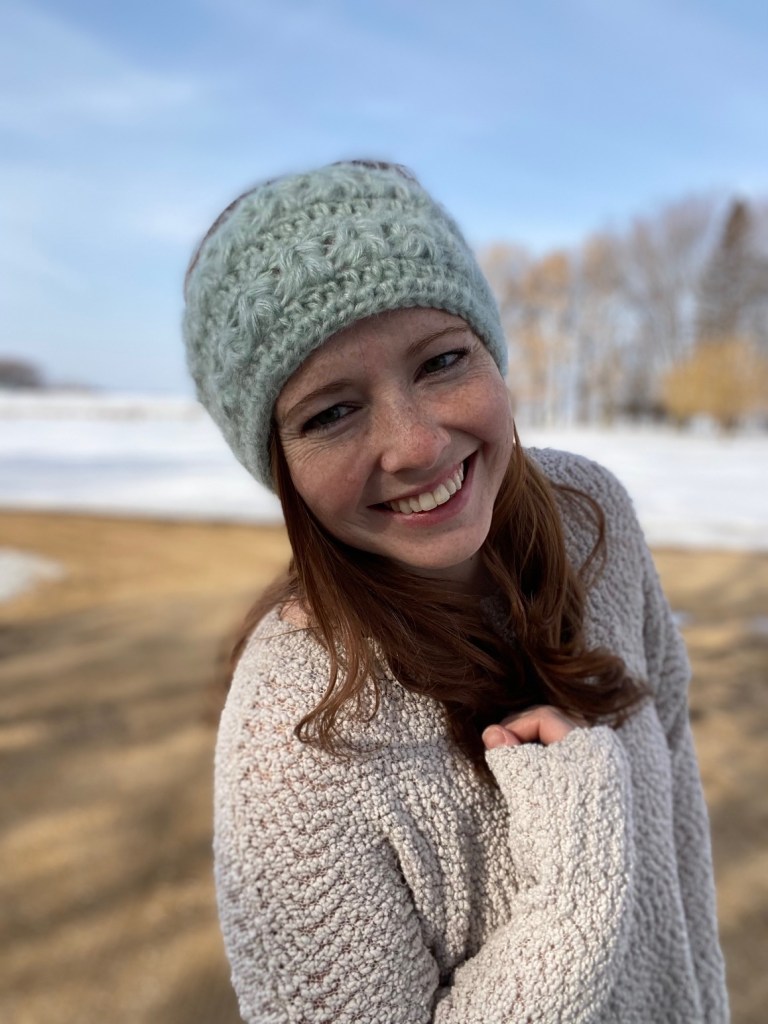
When I posted a reel on Instagram of this hat pattern I had only written in my head and people were interested in the pattern I decided it was time to complete one of my goals for the year and actually write a true crochet pattern! Of course I was a little nervous about format and wording and if anyone would understand it but I didn’t let that stop me this time!
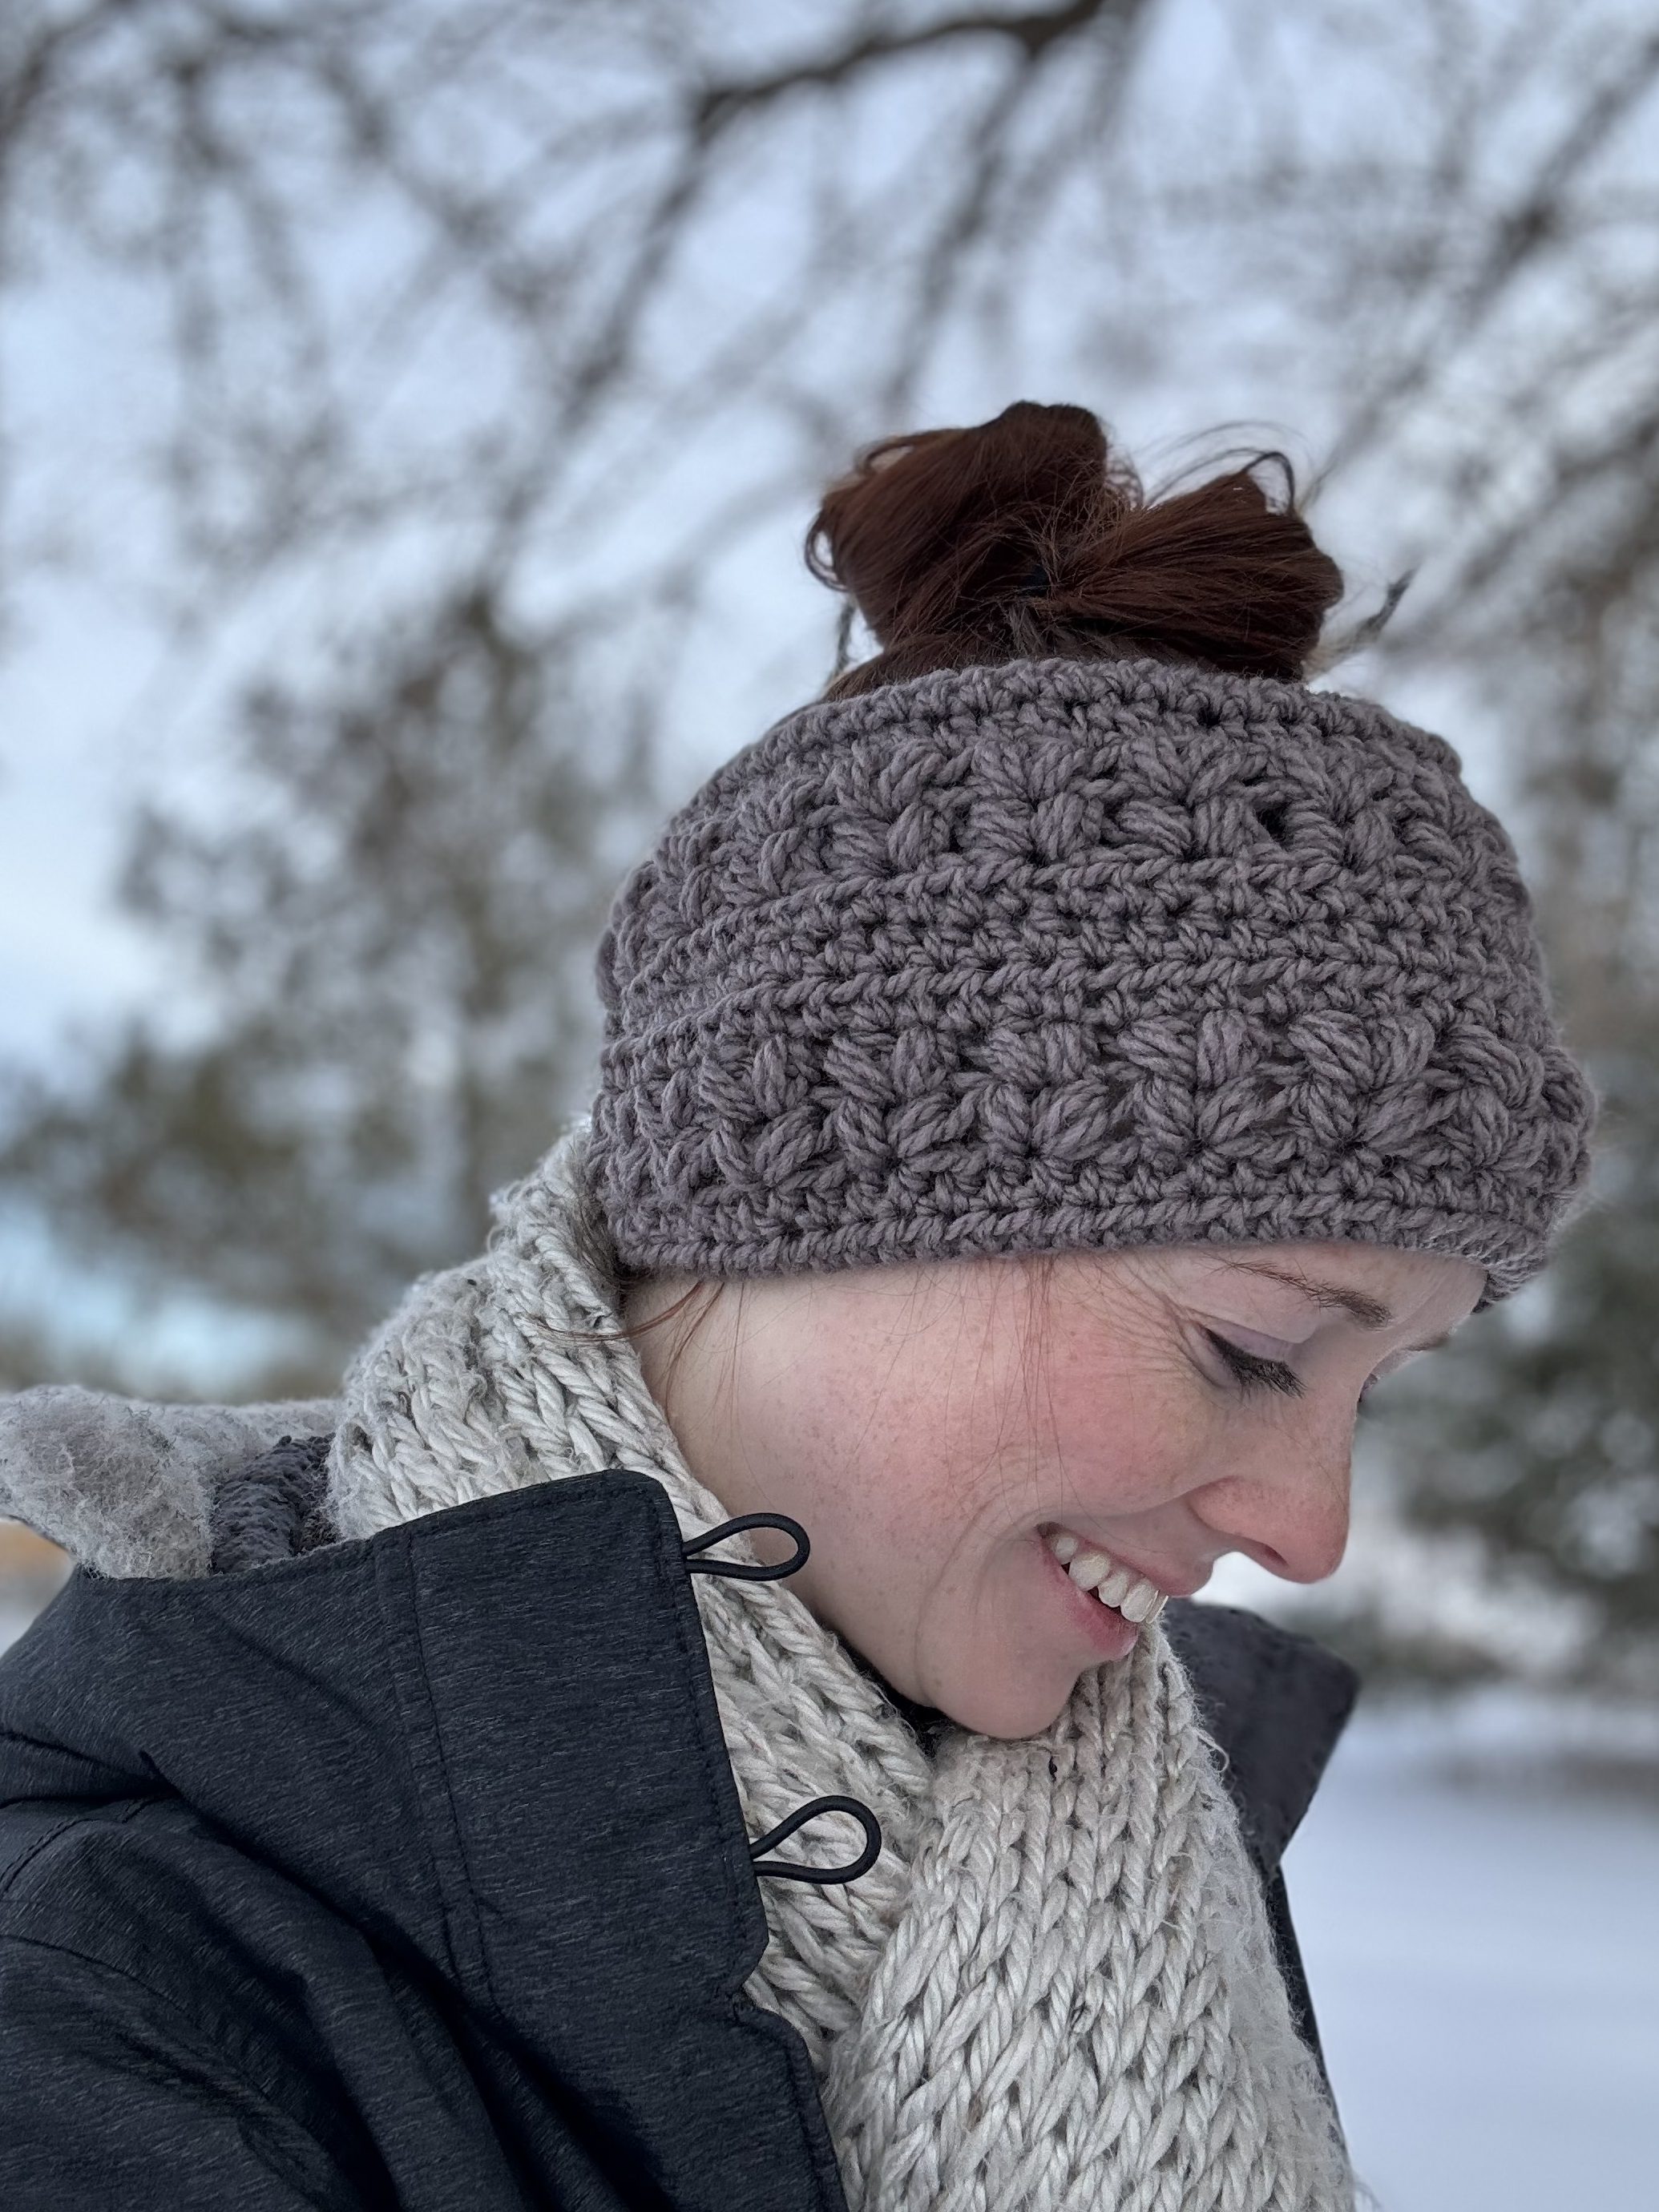
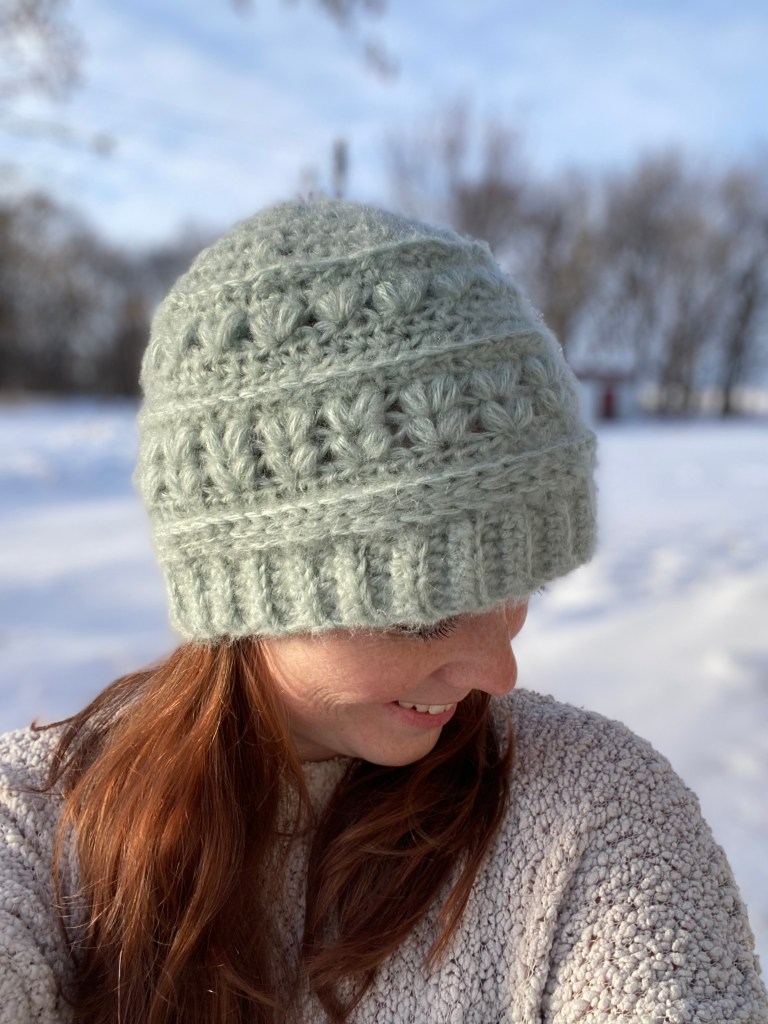
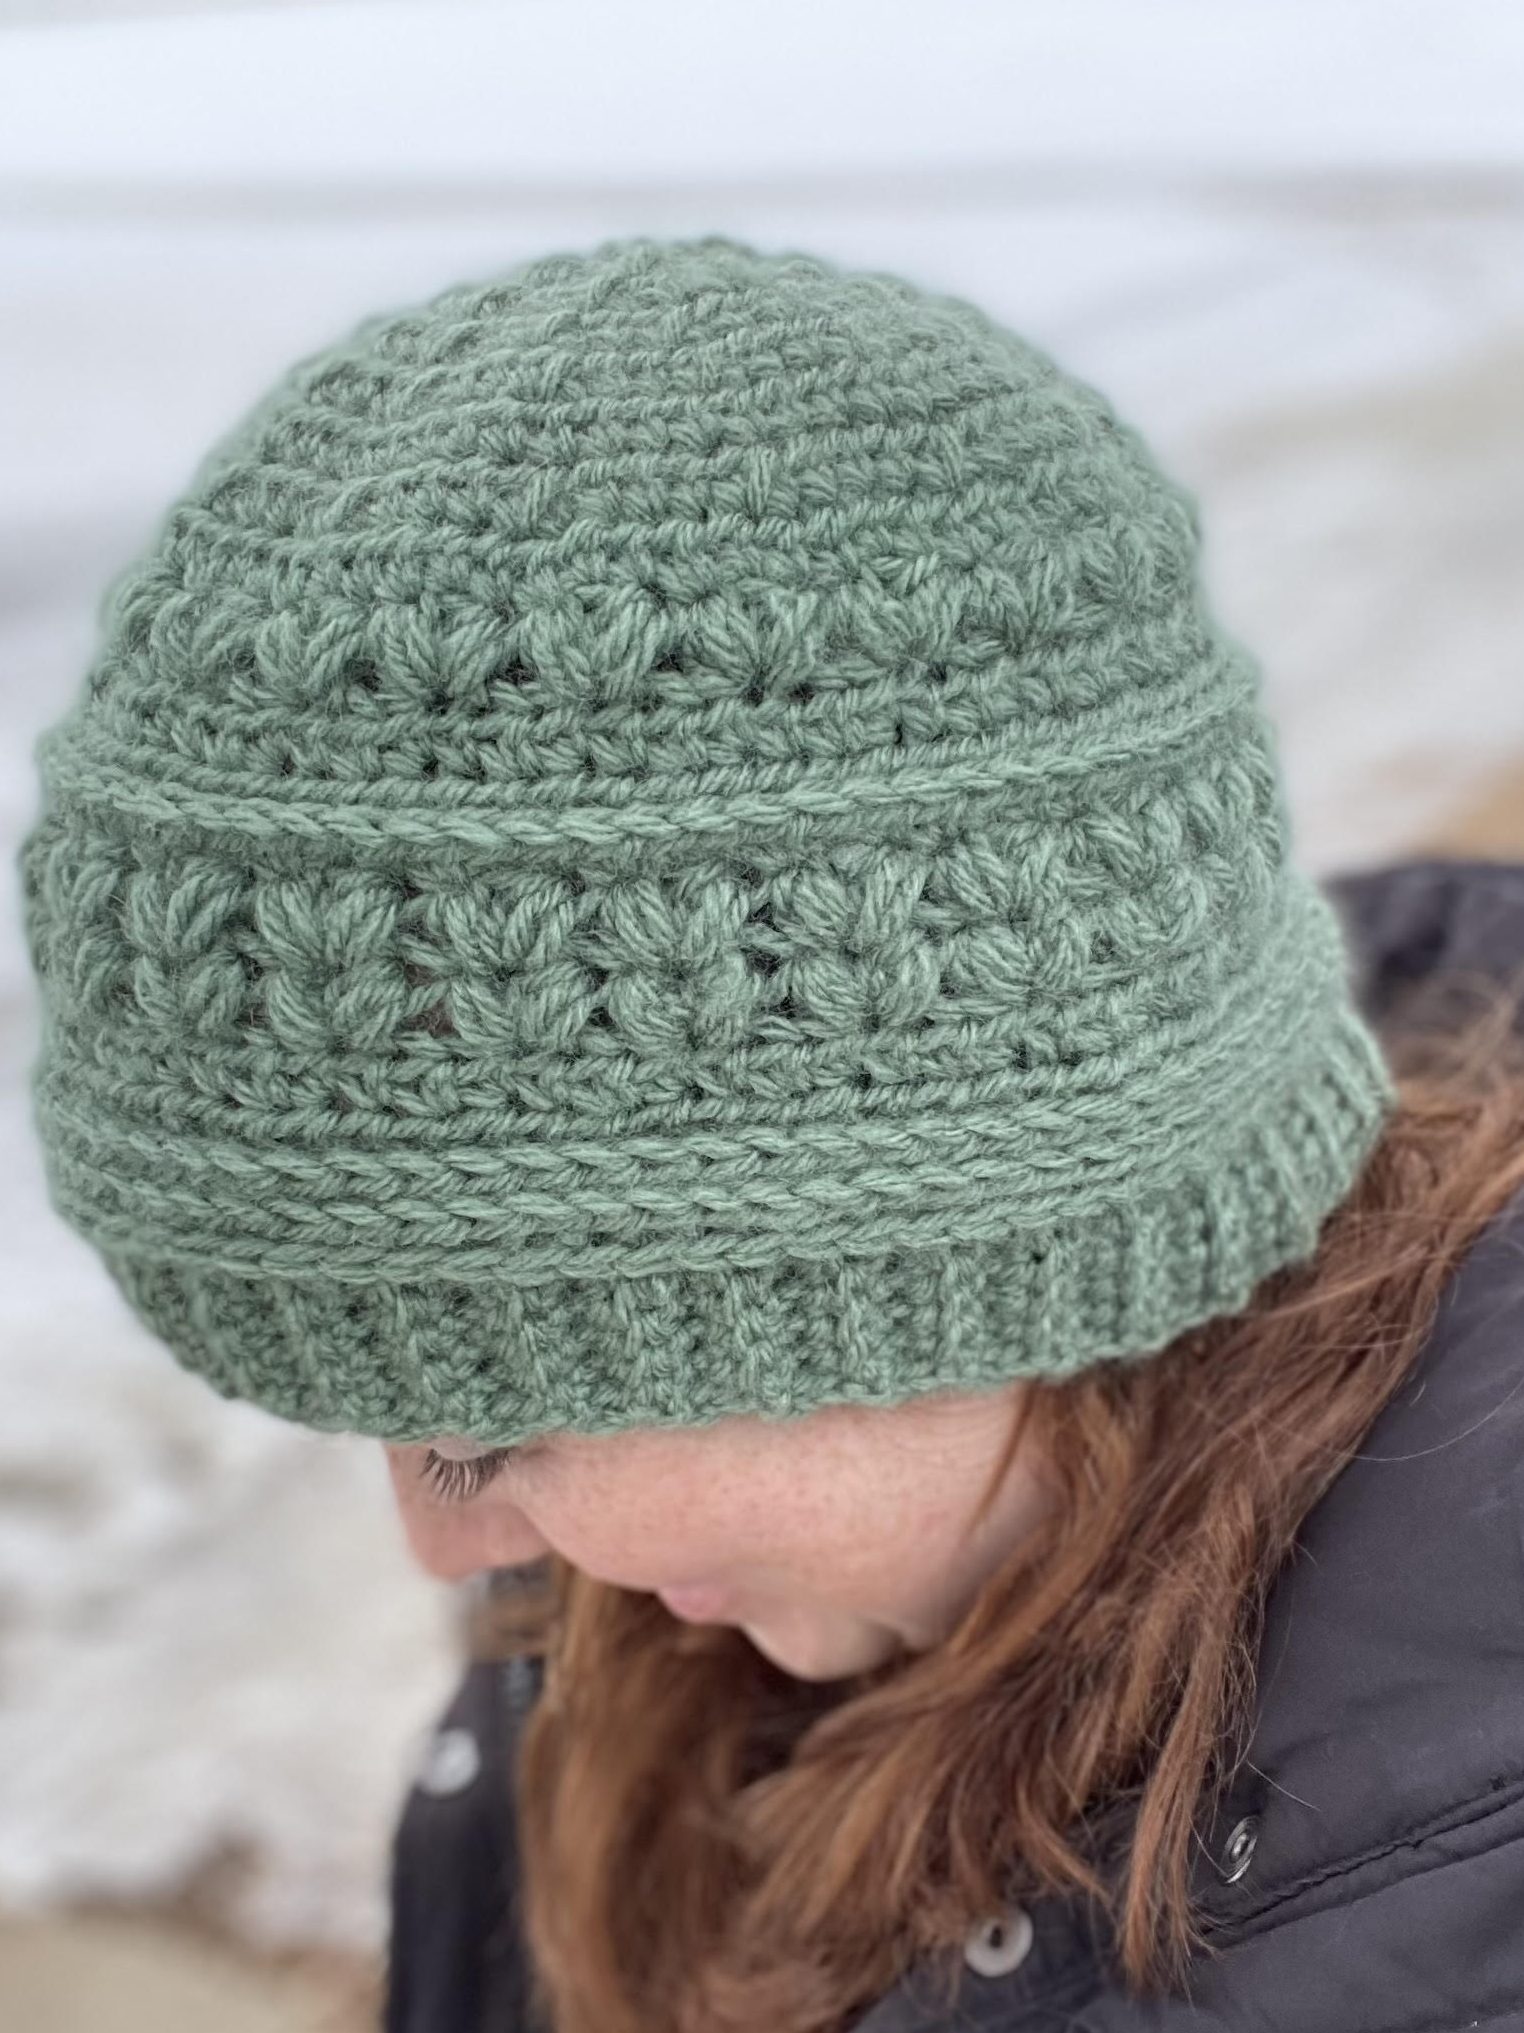
So here is the Bliss Puff Crochet hat pattern, right now it’s just a women’s size but I hope to do some more work and research and get more sizes eventually!
Materials:
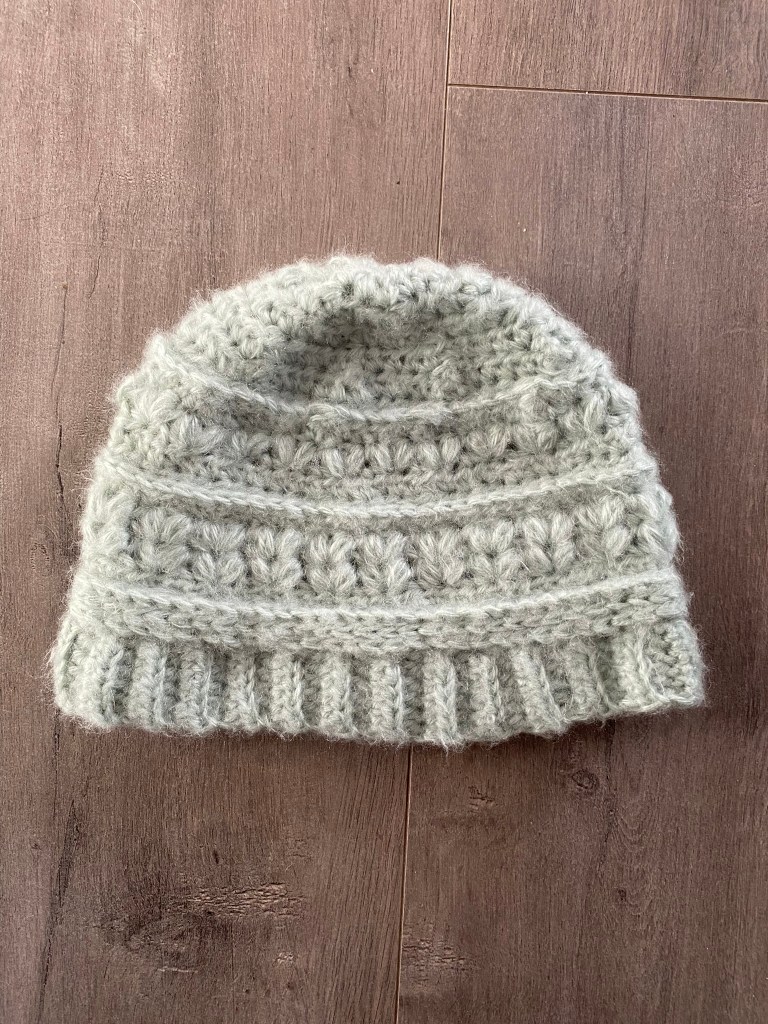
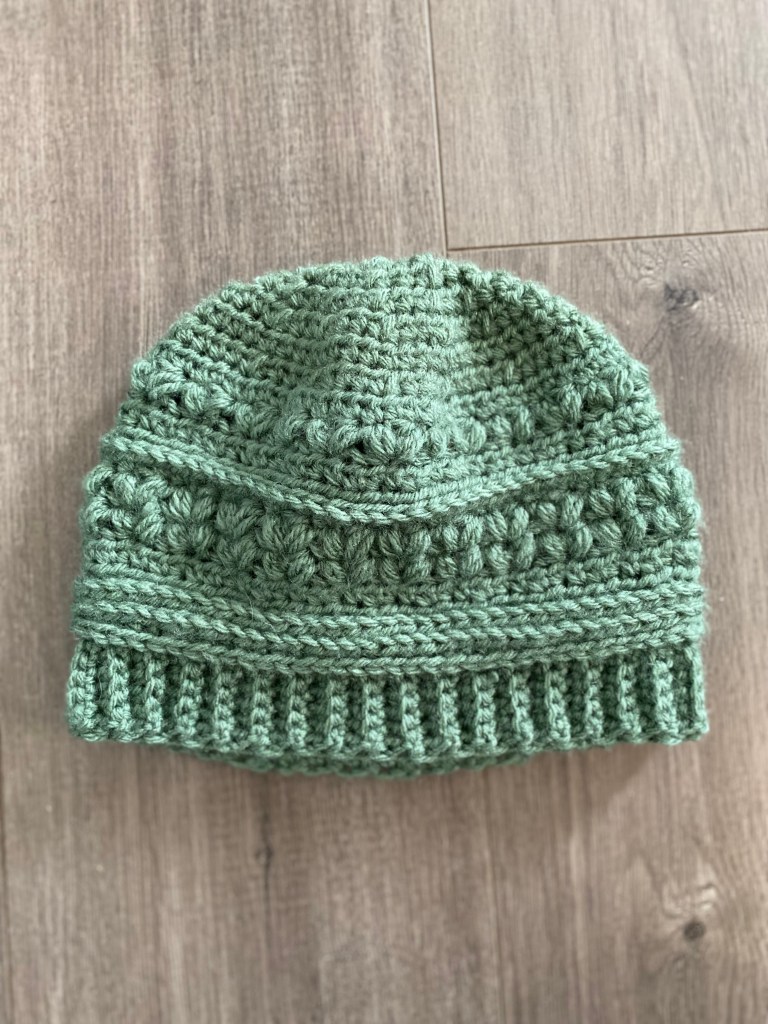
Worsted weighted yarn (In first two photos I used ‘Red Heart Super Saver Brushed Teal Pastel’ yarn. The last 4 photos are ‘Red Heart Super Saver Light Sage’ yarn.)
I/5.50mm hooks
Yarn needle
Notes:
US crochet terms used in this pattern
Sample size is for women
This is a great pattern for people just learning to make hats
() means in the same stitch
** means repeat the section in between **
Disclaimer: I have a weird head shape and this hat is shaped after my head , if you feel like you need more height, just add a row of HDC once you start decreasing stitches
Second Disclaimer: This is the first pattern I have ever released, I have created “patterns” for myself but have never written one for others to use, so bear with me as I learn the best way to write patterns!
Stay warm and enjoy! Contact me with any questions or comments!
Stitches used:
Ch – chain
SC – single crochet
Sl st – slip stitch
HDC – half double crochet
BLO – back loop only
HDC in 3rd loop: half double crochet in the loop/bar behind main stitch that you normally work into
HDC decrease/HDC2TOG – yarn over, insert hook in first st, yarn over, pull through first loop on hook, keep three loops on hook, yarn over, insert into next stitch (4 loops on hook), yarn over and pull up one loop (5 loops on hook), yarn over and pull all 5 loops through
YO – yarn over
Puff stitch/pf – YO, insert hook in designated st, **yo and pull up a loop, yo. Insert hook into same st) repeat ** 3 times. 7 loops on the hook and yo and pull through all loops on hook
Pattern:
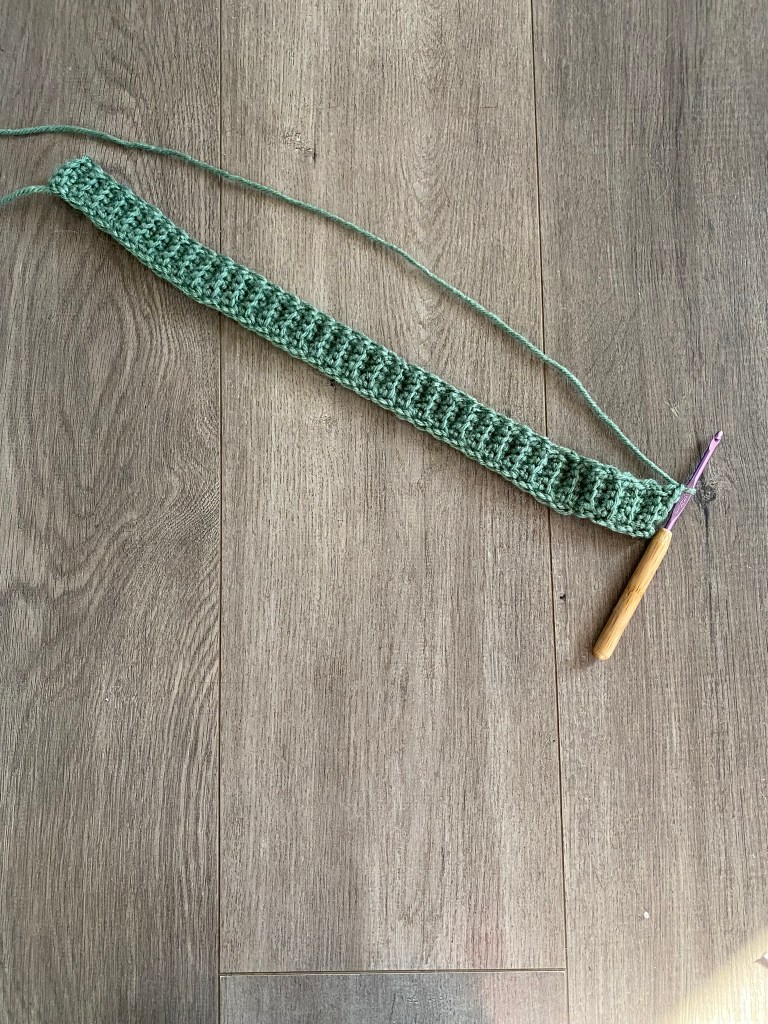
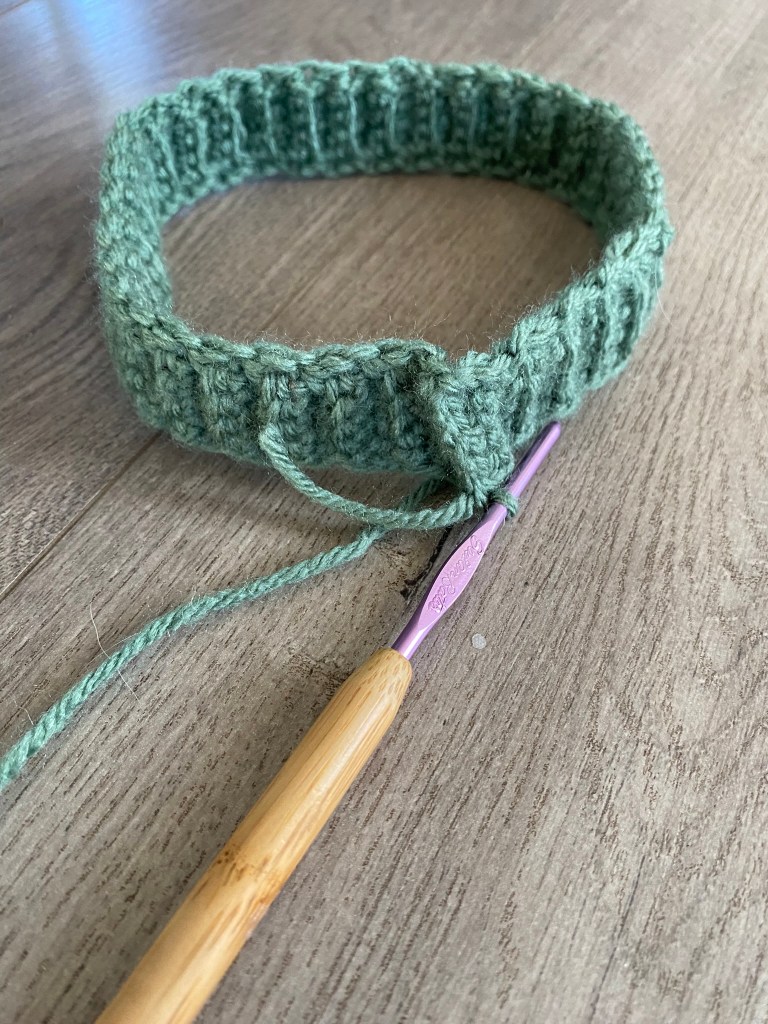
Ch 7. SC BLO across. Turn and repeat until to design head circumference size. Fold ribbing in half and join ends with a slip stitch across the 6 stitches. Flip the ribbing so the stitches are on the inside and your current loop is at the top. (see photos below)
Round 1: (You are now making the hat body and working in the round). Chain 1 and HDC around in each stitch, join with sl st.
Round 2: Chain 1. HDC in 3rd loop in each stitch around, sl st in first hdc to join.
Round 3: Repeat round 2
Round 4: Repeat round 2
Round 5: Ch 1, HDC around, sl st to join.
Round 6: Ch 1, pf into first st, **sk 2 (pf, ch 1, pf)**, repeat **** around, last st just one pf, sl st.
Round 7: Ch 1, pf into first st, from rest of row work in ch space and place (pf, ch1, pf), repeat until end, place one pf into last st of round, sl st.
Round 8: Ch 1, HDC around, sl st
Round 9: Ch 1, HDC in 3rd loop, sl st to join
Round 10: Ch 1, HDC around, sl st to join.
Round 11: Ch 1, pf into first st, **sk 2 (pf, ch 1, pf)**, repeat **** around, last st pf, sl st
Round 12: Ch 1, HDC around, sl st to join.
Round 13: Ch 1, HDC decrease once,** HDC in next 3 st, HDC decrease**, repeat **** til end, sl st to join.
Round 14: Ch 1, HDC around, sl st to join.
Round 15: Ch 1, HDC decrease once, **HDC in next 2 st, HDC decrease once**, repeat **** til end, sl st to join.
Round 16: Ch 1, HDC decrease once, **HDC in next st, HDC decrease in next st**, repeat **** til end, sl st to join.
Round 17: repeat round 16
Round 18: repeat round 16
(Try on the hat to see how it fits your specific head, some people may need a HDC row to add height, always check before fastening off)
Fasten off.
To close the top of the hat: use your yarn needle to run yarn under the front loop of each st around. When you are through all the loops around, pull yarn tight to close the hole. Sew around the stitches in the circle one more time and then weave in the ends before cutting the yarn.
Stay warm and enjoy!!!
This is what your ribbing of the hat will look like before you join it and start working in the roundThis is what it should look like once you join the ribbing